New project: '03 Maycraft 1800

Classic Parker Boat Forum

Help Support Classic Parker Boat Forum:

This site may earn a commission from merchant affiliate links, including eBay, Amazon, and others.

gw204

Well-known member
Joined
Feb 27, 2006
Messages
943
Reaction score
1
Location
St. Leonard, MD
So I'm not sure why I titled this thread "New Project...". Maybe it's just force of habit since the last two boats I bought were a '76 Forumla 233 and an '86 Grady 227, both with their share of "issues". Anyway, I went a different route this time and bought something that works.

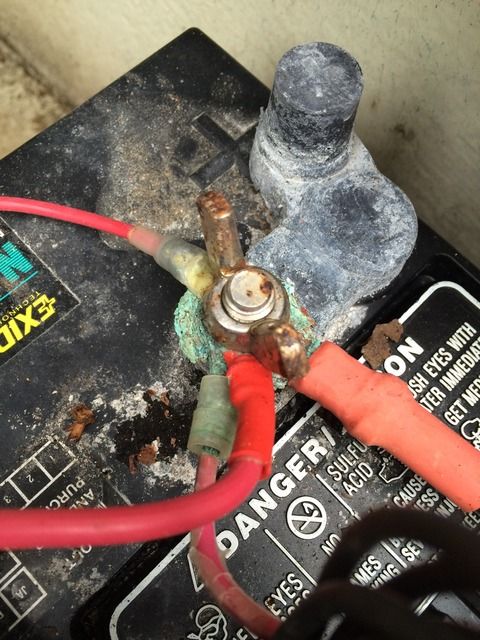
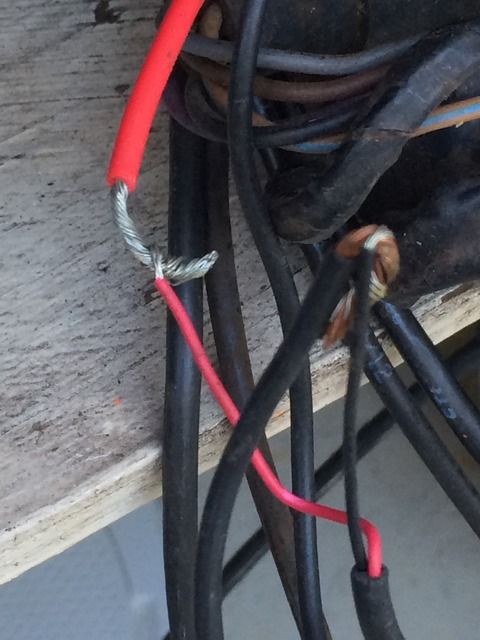
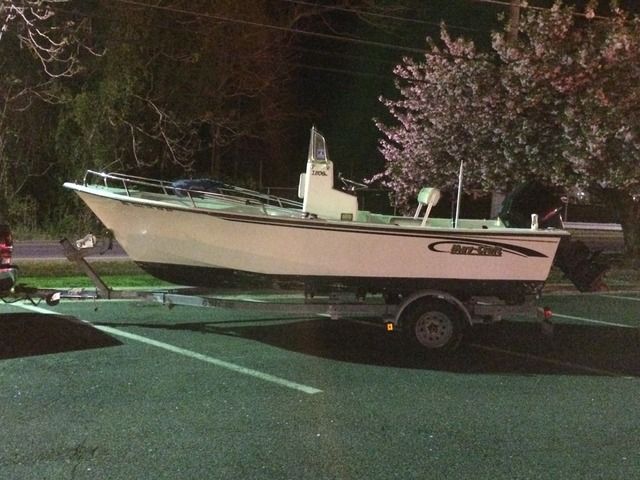
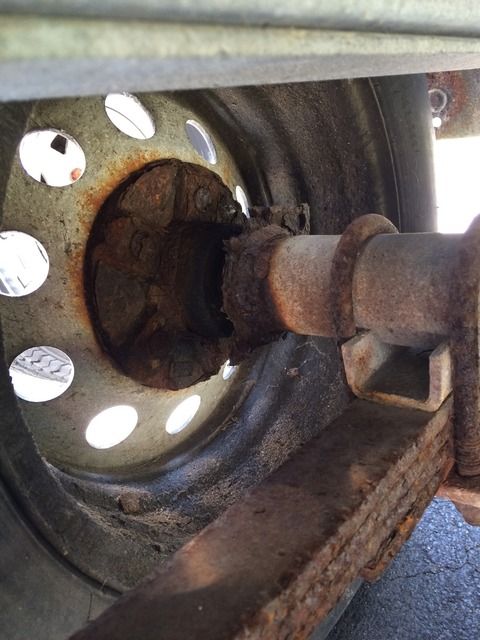
Introducing my new 2003 Maycraft 1800 skiff. She's powered by an '03 Merc 90 and sits on an '03 5-Starr trailer. Picked her up for a cool $3800. Overall, the boat seems very solid. Transom, floor and stringers all sounded very good. Only questionable things I found were some trailer rash on the keel, a fair amount of moisture and "snot" around the front of the fuel tank and a crack in one of the outside corners of the aft wells. None of which were enough to deter me from making the purchase.

IMG_1412_zpsv4igiyqt.jpg


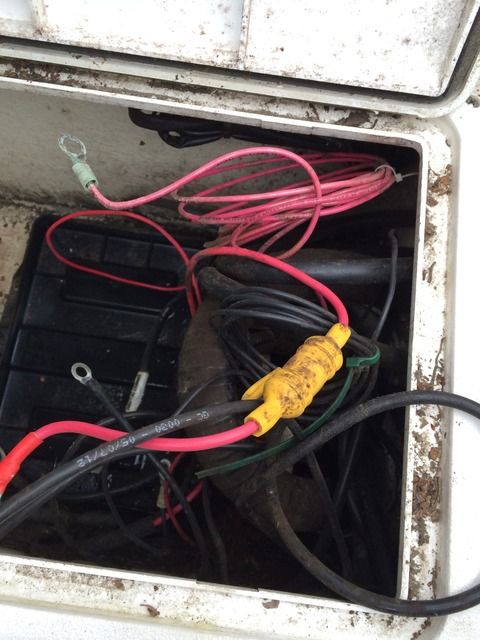
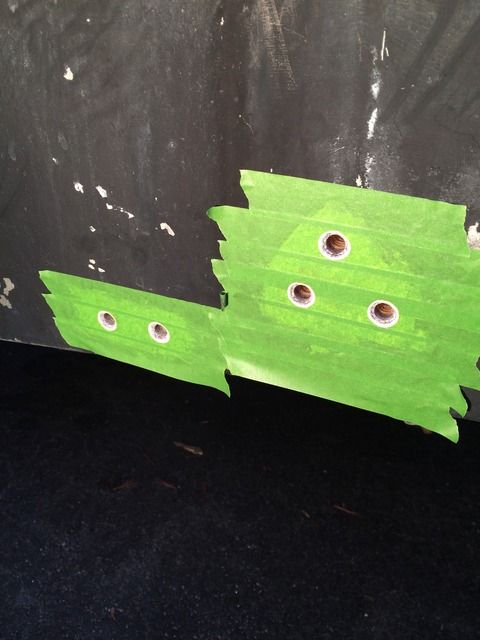
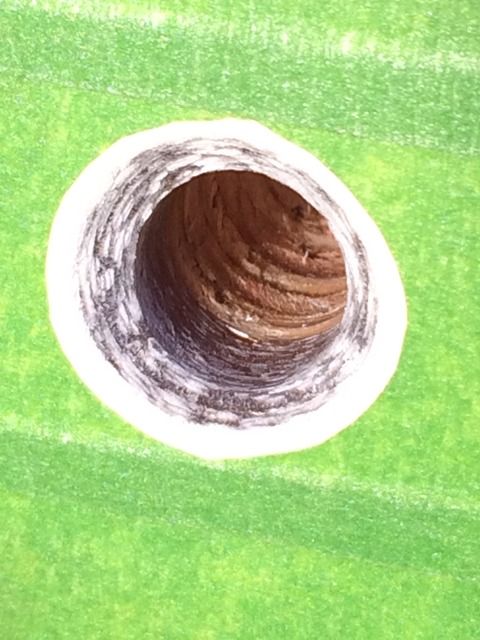
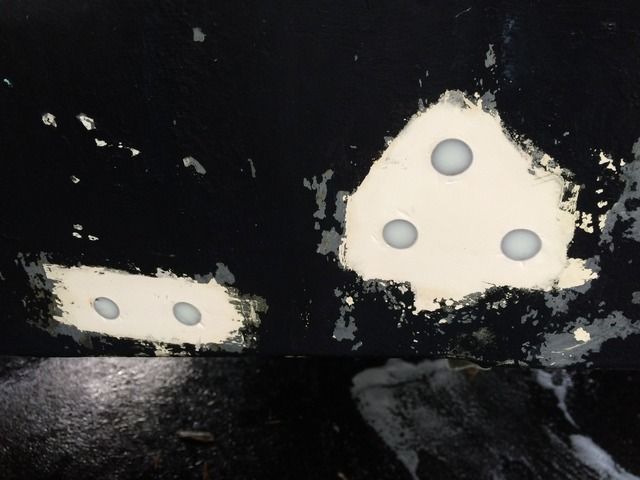
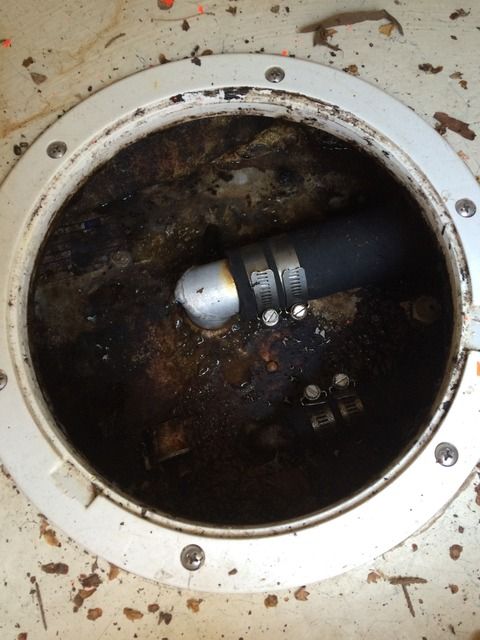
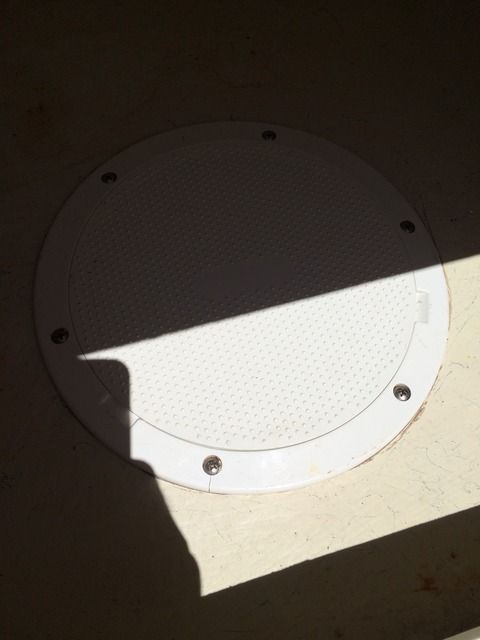
Anyway, I will immediately admit that I have failed miserably with my initial photo documentation. After a quick stop for dinner at the Broadneck Grille, I got her home from the eastern shore of MD about 11 PM on Saturday. It was too chilly to do anything outside and I was beat...so I just hit the sack. The next morning my son was chomping at the bit to start "working" on her and any delay introduced by taking "as delivered" pictures was unacceptable. So we did a few little quick, easy things before I unleashed him with the soap and water. According to the seller, the boat had been sitting idle (covered) for 18 months but it was still filthy. So we emptied all of the stuff from the console and storage wells and I set about R&Ring the 3 deteriorating deck plates.

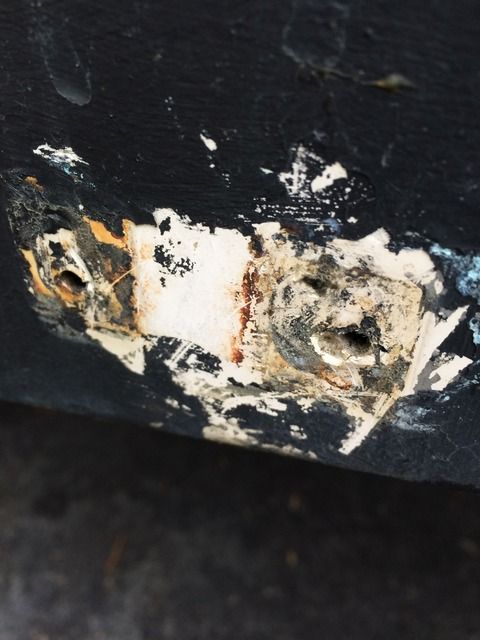
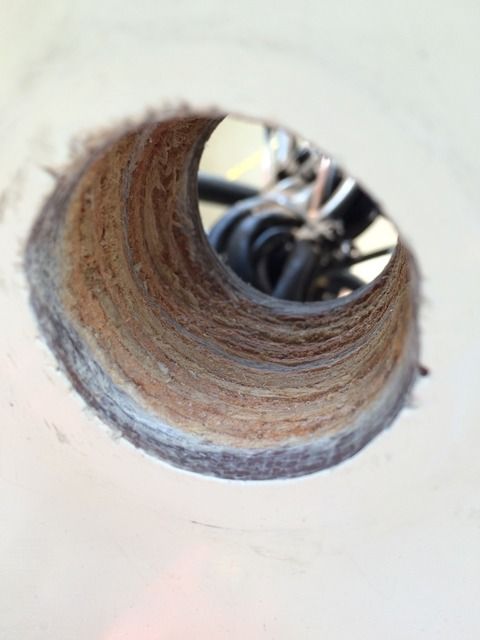
Popping them open revealed the boat's 42 gallon aluminum tank. With all the build up of grime on the plate sealing flanges, I'm not surprised they were leaking.

IMG_1416_zpstallqtlo.jpg


IMG_1418_zpsuhrplptt.jpg


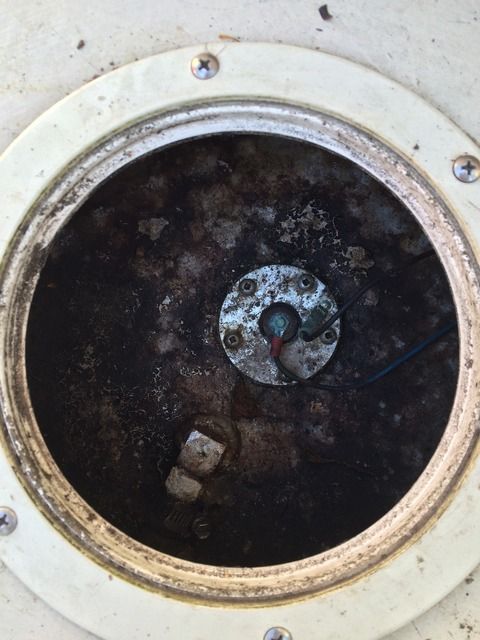
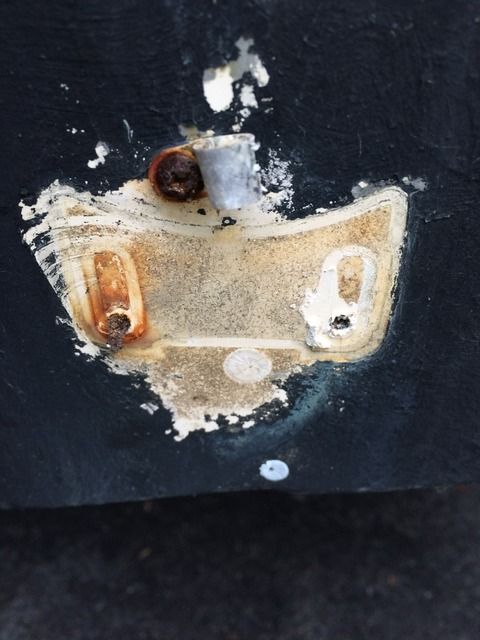
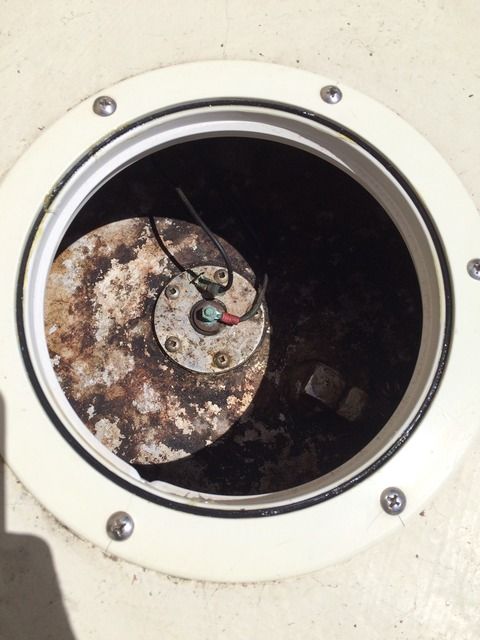
The boy and I cleaned the lids, o-rings and flanges thoroughly and got all the gunk up. I left them open for as long as I could to get some fresh air in there, lubed the rings with plumber's grease and screwed/popped the lids back on. I will replace all of them later this season, but for now this will do.

IMG_1419_zpsaismaqx2.jpg


IMG_1420_zpsvgi0ekpb.jpg


A hose, a bucket, some dish soap and an old car wash mit kept this little guy entertained for about 2 hours.

IMG_1424_zpslucjn738.jpg
 
Only questionable things I found were some trailer rash on the keel

Brian..........That has Everything to do with that trailer setup.


At the Very least it needs forward keel bunks. If it was mine it would get all new bunks.
 
Yep. It's on a roller sled and I have yet to launch and retrieve it so I'm not sure how it behaves. Judging by the amount that my Tacoma squatted when I hooked it up though, the setup is all wrong.

The trailer needs some TLC so I will most likely be pulling the boat off and putting it on my other tandem for the time being. I'm pretty this one had brakes on it at some point as it has a 3200 lb. GVWR and MD requires all trailers over 3K to have them. That being said, I can see why it doesn't have them now. Also, someone replaced this axle once before. The trailer has a Reliable Sure Lube sticker on it, but that isn't a Sure Lube axle.

IMG_1421_zpswcj3plip.jpg


Springs aren't the best, but I've seen worse...


Tires are original to the trailer and were run underinflated for a very long time...


So I need to add up the cost of the necessary repairs and figure out where to go from there. If I can safely grind off what's left of the brake flanges and spray some cold galvanize on the bare metal, I will probably continue to run that axle. If not, I will look at my options but will be hard pressed to spend $2K on something new if I can fix this one for $500.
 
Brian - Wow! That was a steal. Nice boat. You and your family should have alot of fun this summer. Enjoy.
 
I think I'm going to name this boat "Deferred Maintenance"... :roll:

One trailer tire was at 25 psi, one at 32. They say max inflation pressure is 50, but with some cracking in the tread and sidewall, I didnt' want to put them that high. So, I ran them up to 46 for now. Going to order two new ones soon.

Spark plugs were in finger tight. Pulled them out, wiped off the fuel mix that had been escaping through the poor seal, put them back and and torqued them to 20 ft./lbs.

The leading edges of the prop blades are chewed up pretty good and there is a bend in the tip of two of them. No big deal, I'll pull it off and have it reworked...or so I thought. Spun off the prop nut and lock washer and the prop wouldn't budge. Crap. Held block of wood against the based of the blades and gave it a few good whacks. No luck. I had this same thing happen before with the first boat I bought. During that ordeal, one of the guys my Dad worked with made a simple prop puller for me. Amazingly enough, I was able to find it after 15 years but the arms wouldn't fit between the inner and outer hubs. DOH! Normally I would resort to tilting up the engine and soaking the splines with penetrating oil, but I can't do that since there's something wrong with the oil tank cap and it leaks if you tilt the motor up. So, I resorted to heat because I didn't feel like waiting until the oil leak gets fixed. Lit up the propane torch and directed a small flame at the hub sleeve. After a minute or two I gave it a tug and slowly slid off. Whew...

I guess it's been at least 5 years since this prop was off.

IMG_1465_zpsdc1hh18w.jpg


Then I turned my attention to the removable hub. The sleeve was seized in the hub bushing. I first went with hammering a screw driver in between the inner hub and the bushing and breaking off pieces. Then the bushing thickness increased to where I could no longer break it. Time for more heat. Didn't know prop hub bushings were flammable...

IMG_1466_zps5t898f8o.jpg


The following day I changed methods and went with the drill. That was the ticket. Several 1/4" or so holes in the bushing allowed me to break off enough chunks to get down to the sleeve. Set a similarly sized socket on it and pounded it out. Flipped the prop over, put another socket on what was left of the bushing and pounded it out as well.

IMG_1467_zps65p34pp8.jpg


IMG_1468_zpsm8e2hayq.jpg


My drill bit ate into the inner hub just a little bit, but I think the prop is still usable. At the very least I will keep it around for a spare. In hind sight I should have went right to penetrating oil and heating the inner hub as I think that would probably have saved me a lot of work and caused less damage to the inner hub :?
 
Some cosmetic "fixes" to report...

Last night I removed 5 cheap plastic rod holders and now have a bunch of holes to fill in. Not the most fun thing to do, so for now they might just get caulked screws with finish washers.

Had a little more time after that, so I decided to get the name off.

IMG_1471_zpsfmk9pzwp.jpg


That's better...

IMG_1474_zpstpiwcfro.jpg


Moved on to the hull graphics after that. They weren't faded at all, but all of the edges were peeling up. Off they came. I got the stripes off of one side as well, but didn't grab a pic because I was racing to get the cover secured before a storm hit. Hope to get the stripes off the others side tonight and wipe off any remaining adhesive.


The graphics left a pretty good shadow so I see lots of buffing and polishing in my future... :)
 
Have to say... this is one of the nicer 'projects' that you have drug home. :D

I think Deferred Maintenance would be the perfect name for this one. :wink:
 
Megabyte":18d53evo said:
Have to say... this is one of the nicer 'projects' that you have drug home. :D

Yeah. I could put this one in the water and it would float AND run!!!! lol.
 
05 MAY 2016 update...

The bilge pump isn't working so I started trying to identify which wires to look at for troubleshooting. Looks like they all need help as there's just a bit of corrosion on all of the lugs...

IMG_1482_zpsgczopzhc.jpg


Still not sure what's what...but somebody took the term "service loop" to the extreme.

IMG_1483_zpsvgmosnbs.jpg


Since there was rain in the forecast, I didn't want to pull back the tarp I put over the boat to get up under the console, so I switched gears and turned my attention to the two transducers on the transom. There's only one fishfinder and rather than determine which was the working one, and leave it, I pulled them both off. One was attached with two SS screws...but no caulking. Uh oh... :( The other had one SS screw and one steel screw that had rusted away to pretty much nothing. Cable clamps were mounted with steel screws as well. Nice.

IMG_1484_zpsfq54rhyf.jpg


IMG_1485_zpsvh1eolna.jpg


After getting the rusted off screw out, I drilled each hole to about 1/4" and found the transom core to still look perfect. Can't explain that one but it was a nice surprise. I'll enlarged them a little more and put a counter sink on each before filling with thickened epoxy. Then I'll remount one transducer correctly...if the rain ever stops. :roll:
 
Continued pulling wires out over the weekend. Got both transducers fully removed. Each had the power wires for the unit incorporated into the plug, so I ended up undoing some 12V connections too. It's amazing any of this stuff worked...

IMG_1493_zpss5ky06hc.jpg


I also pulled out the thru hull for the bilge pump. It's a little strange in that it goes through the transom instead of the hull side, but there are large foam filled boxes in each aft corner, so I understand why they did it this way. Always good to see nice, dry, rot free core.

IMG_1506_zpsunpc1evp.jpg


Lastly, I addressed the 5 screw holes from the transducers that I removed. Bored them out to 11/32 (I think), countersunk the holes and taped off the surrounding areas. Then I thoroughly coated the inside of the holes with epoxy before inserting 1" long pieces of a dowel rod I found in the basement. Topped off the remaining part of the holes with some epoxy thickened (obviously not enough) with cabosil. I'll sand the areas flush before pulling the tape.

IMG_1509_zps5okd1oyl.jpg


More nice, dry, rot free core. :D

IMG_1510_zpsbzccsevy.jpg


Messy messy. :roll:

IMG_1512_zps4bokjf9x.jpg
 
Wiring looks just about right. :shock:

Shame I'm further away from you now.
I have a whole box of Blue Seas stuff that probably has some items in it you could use.
 
Megabyte":2hrlo9uf said:
Wiring looks just about right. :shock:

Shame I'm further away from you now.
I have a whole box of Blue Seas stuff that probably has some items in it you could use.

I'll be in Bethany w/ the family for a week in mid-June. :D
 
Sanded down the excess epoxy last night. I wasn't overly concerned with cosmetics, but I was. My intention was to just get everything nice and flush with the surrounding gelcoat, but I got a little too aggressive with the Dremel and dug in in a few places. Hard to tell unless you really get close. Oh well, at least the holes are sealed up. I'll sand the spots down more and gelcoat the entire areas once I get the bottom paint off.

IMG_1587_zpsdjhoa02w.jpg


Trying to decide which fishfinder to put on it as well. It came with the Lowrance Elite4 (left) and I already had an old X71 (right) as well as an Apelco 265 (bottom) on the shelf at home.

IMG_1513_zpsfillws1i.jpg


The Elite4 is a color chartplotter, but the screen is so damn small that I feel like it would be useless trying to view both screens. I not sure if it includes generic charts yet or if maps have to come on a microSD card. I have an old CMAP map of the Chesapeake, but I'm not sure if it will work with this unit.

The X71 is just an old school B&W fishfinder. I'm leaning towards using this one and my old Garmin handheld GPS for nav. The KISS theory has always worked for me...

apelco-265-fishfinder-raytheon-electronics-works-great-no-power-cable-6cd75d117f38fc104dcb8239ae434f7c.jpg


Don't know much about the Apelco, other than the fact that is just seems cheap.


I also tempted to sell all of these and picking up a simple Furuno LS6100 or trying to find a used Raymarine RL760C. Had a RL70C the old Grady and I liked it. Color chartplotter with a nice size screen...and I could use my CMAP card.
 
gw204":29rom831 said:
I also tempted to sell all of these and picking up a simple Furuno LS6100 or trying to find a used Raymarine RL760C.

This ^^^^^^^^^
 
Pulled the lower unit in order to check the water pump. The PO said he replaced it last year but after seeing the sorry state of the grease on the prop shaft I was skeptical.

The impeller was chewed up along the top of the vanes, so I'm really glad I tore it down. Also, the pump base is corroded where it surrounds the driveshaft and doesn't look like it would seal against the base plate. The base houses the drive shaft seals so I don't really want to pull it off, but I guess I'll have to. Full pump kit takes the parts cost of a water pump job from $50 to about $110 (OEM parts). Oh well...

IMG_1594_zpssrhoyzuz.jpg


IMG_1595_zpsuu7c5xre.jpg


I'm sure I could pull the base off and rebuild the corroded area, but then I would be into a new base gasket and new seals anyway...and those would probably run me another $25 shipped so the cost difference will be negligible. Maybe I can get away with an in-place rebuild of the area...
 
That job has not been done for many years.
Best to take it all apart and do it correctly.
 
Don't know much about the Apelco, other than the fact that is just seems cheap.

That is the very first unit I ever owned.... Before I knew better. :( Division of Raymarine :(

The cables are held into the unit with O-rings and they fall out. What a POS!


I also tempted to sell all of these and picking up a simple Furuno LS6100

Step up..... The 6100 is OLD! It's also only a 300watt unit.

Rather see you with a used 585. Easier to use....Better machine.....600 watt or 1000 watt

Stay away from Raymarine!
 
warthog5":10y0pdvg said:
Step up..... The 6100 is OLD! It's also only a 300watt unit.

Rather see you with a used 585. Easier to use....Better machine.....600 watt or 1000 watt

Trying to do this on a very limited budget. So I'm leaning heavily toward the X71 I have already. Maybe in the future I'll do something fancier.
 
Back
Top