jeffnick
Well-known member
Here's the results of a couple transducer experiments.
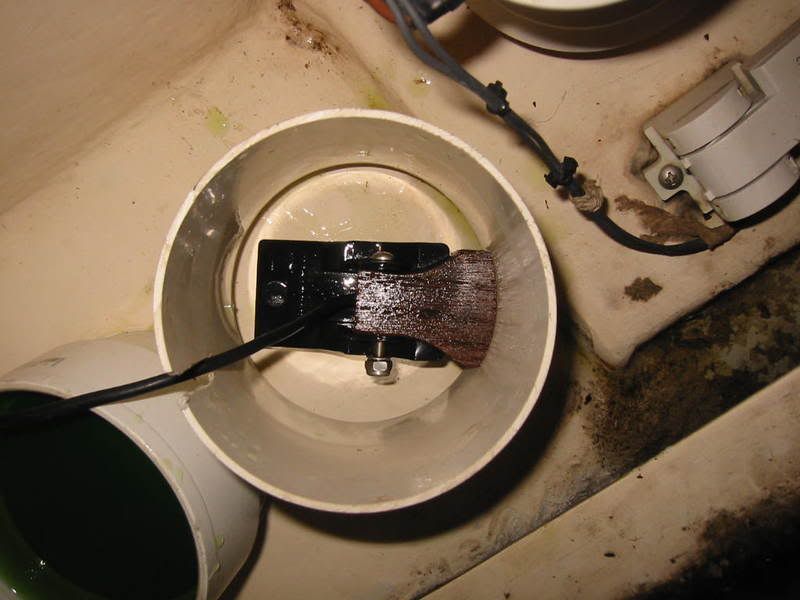
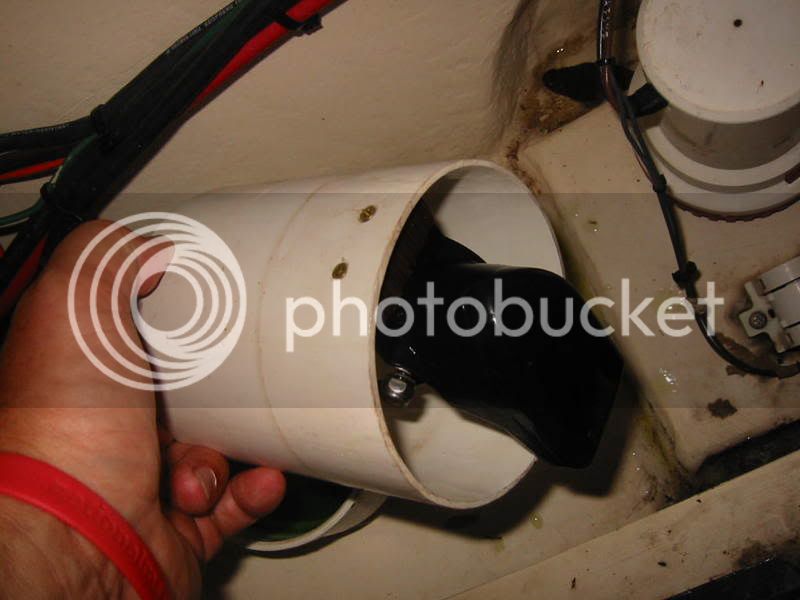
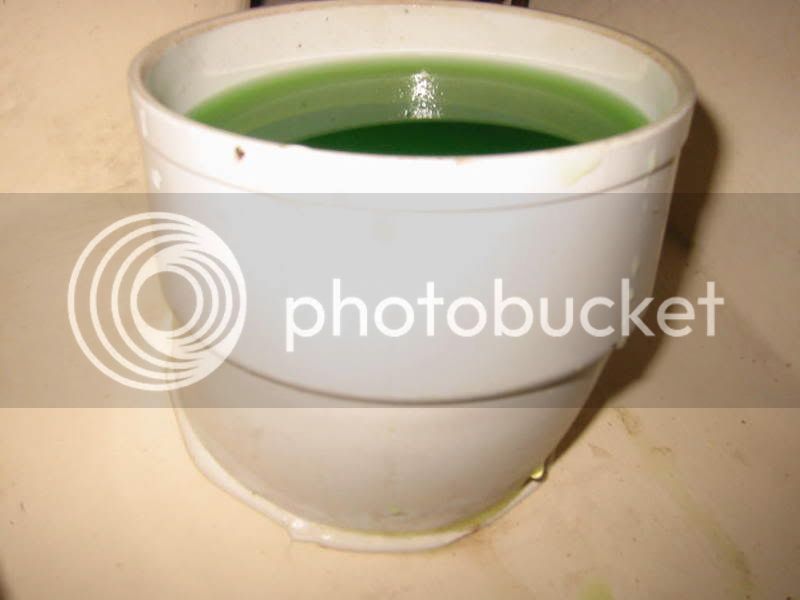
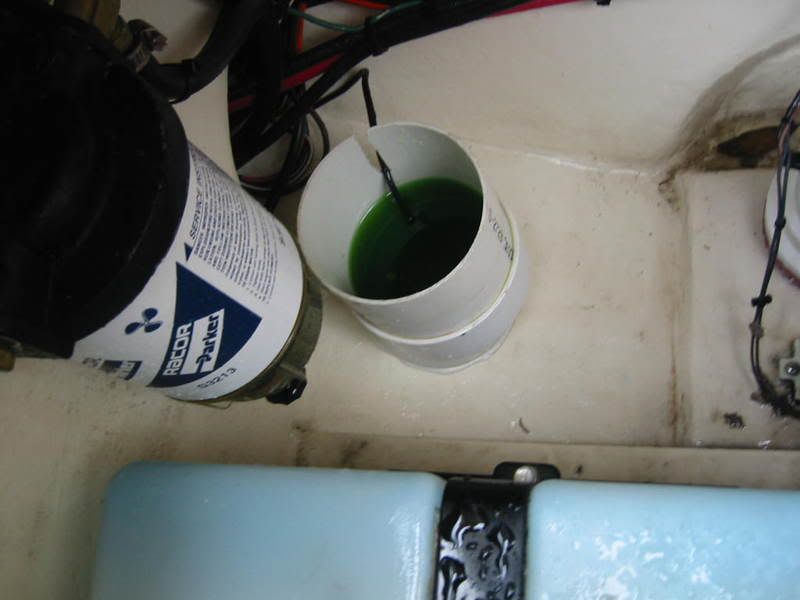
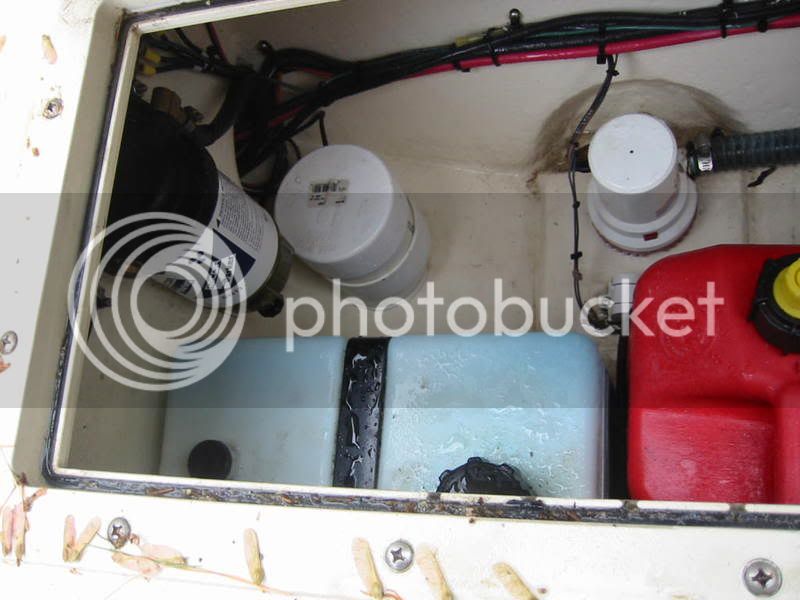
1) We'd been having trouble keeping a lock on the bottom and couldn't seem to get rid of a rooster tail so I thought I'd try putting the 'ducer inside the boat. Not wanting to get all fancy, I simply used 5200 to stick a piece of PVC pipe to the hull after I had jerry rigged a way to fix the transom mounted 'ducer to the pipe. I filled the pipe with antifreeze because the weather was going to get cold before I could test it, then put a cap on the pipe. Result = perfectly operating depth sounder down to a couple feet that doesn't lose lock at WOT and no rooster tail. These pics were taken after a Fl cruise which included some pretty enthusiastic offshore runs, and the fluid level is still fine. I should replace the antifreeze with mineral oil and seal it all up, but probably won't.
2) I've been looking for a way to attach/glue a starboard plate to the transom so I don't have to drill holes in the boat to attach a transducer directly to the transom...I'd attach the 'ducer to the plate. You may be aware that even 5200 will not stick to starboard - 'gluing' Starboard to the transom seemed like an impossibility. Then one day I noticed that Doug had put up some hooks on the door frame; they came with those 3M Command Strips, and were holding up unbelievably well on the Starboard door frame.
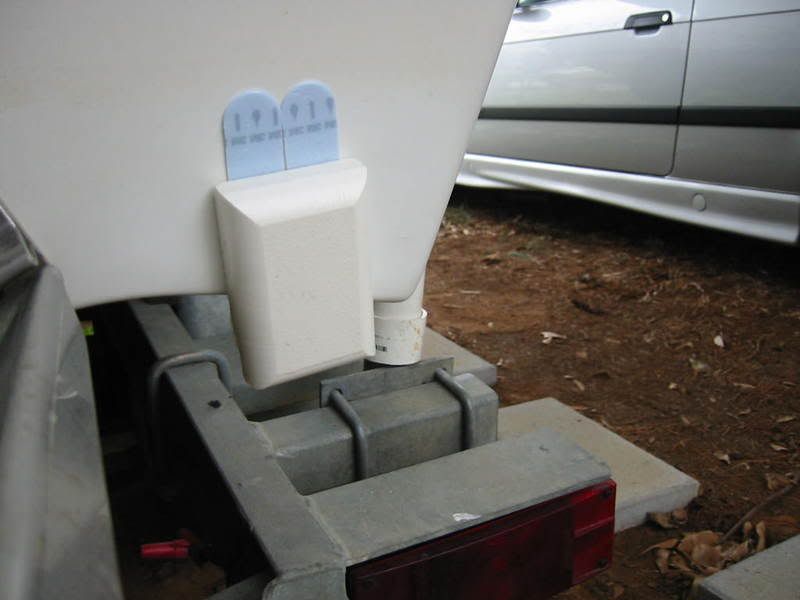
I got some water resistant Command Strips at WalMart and used them to stick a piece of Starboard to the transom. I mounted the Starboard as if it were a transducer, having it protrude about 1" below the bottom of the boat (that's 1" on the high side...it was considerably deeper on the low side). I then took the boat to the lake and ran it 35 mph. The rooster tail was awesome and the Command Strip mounted Starboard stayed put for 2 outings, until I removed it. I can't guarantee you'll have the same results but if the inside the hull experiment above hadn't panned out, this is the way I'd test 'ducer positions on the transom. It also shows that the Command Strips are a good way to attach other stuff to Starboard.
Here we see the Starboard 'glued' to the transom w/ the Command Strips protruding for easy removal.
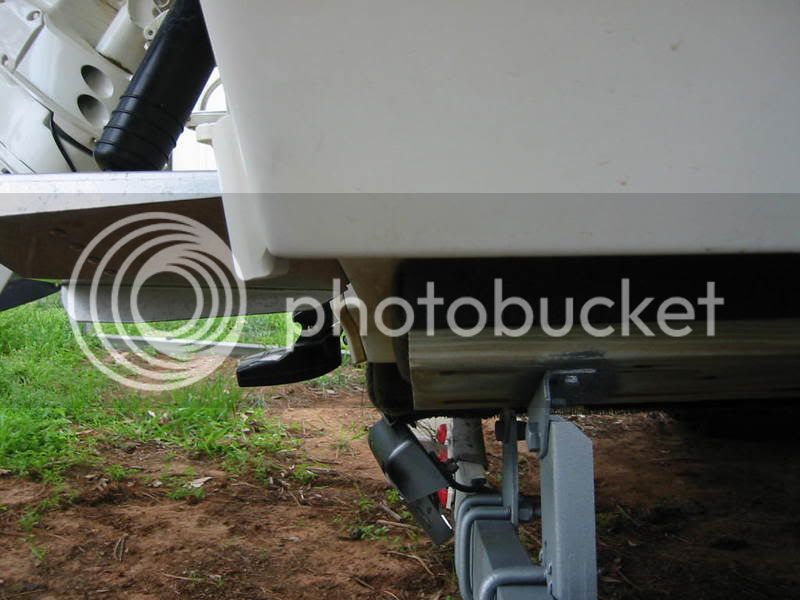
Side view.
I'm in the process of removing the Starboard here...you pull the tab gently and the stickum lets loose.

1) We'd been having trouble keeping a lock on the bottom and couldn't seem to get rid of a rooster tail so I thought I'd try putting the 'ducer inside the boat. Not wanting to get all fancy, I simply used 5200 to stick a piece of PVC pipe to the hull after I had jerry rigged a way to fix the transom mounted 'ducer to the pipe. I filled the pipe with antifreeze because the weather was going to get cold before I could test it, then put a cap on the pipe. Result = perfectly operating depth sounder down to a couple feet that doesn't lose lock at WOT and no rooster tail. These pics were taken after a Fl cruise which included some pretty enthusiastic offshore runs, and the fluid level is still fine. I should replace the antifreeze with mineral oil and seal it all up, but probably won't.
2) I've been looking for a way to attach/glue a starboard plate to the transom so I don't have to drill holes in the boat to attach a transducer directly to the transom...I'd attach the 'ducer to the plate. You may be aware that even 5200 will not stick to starboard - 'gluing' Starboard to the transom seemed like an impossibility. Then one day I noticed that Doug had put up some hooks on the door frame; they came with those 3M Command Strips, and were holding up unbelievably well on the Starboard door frame.
I got some water resistant Command Strips at WalMart and used them to stick a piece of Starboard to the transom. I mounted the Starboard as if it were a transducer, having it protrude about 1" below the bottom of the boat (that's 1" on the high side...it was considerably deeper on the low side). I then took the boat to the lake and ran it 35 mph. The rooster tail was awesome and the Command Strip mounted Starboard stayed put for 2 outings, until I removed it. I can't guarantee you'll have the same results but if the inside the hull experiment above hadn't panned out, this is the way I'd test 'ducer positions on the transom. It also shows that the Command Strips are a good way to attach other stuff to Starboard.
Here we see the Starboard 'glued' to the transom w/ the Command Strips protruding for easy removal.
Side view.
I'm in the process of removing the Starboard here...you pull the tab gently and the stickum lets loose.
 . sorry for my incompetancy, i just cant figure out whats going on here :lol: