My '95 2530

Classic Parker Boat Forum

Help Support Classic Parker Boat Forum:

This site may earn a commission from merchant affiliate links, including eBay, Amazon, and others.
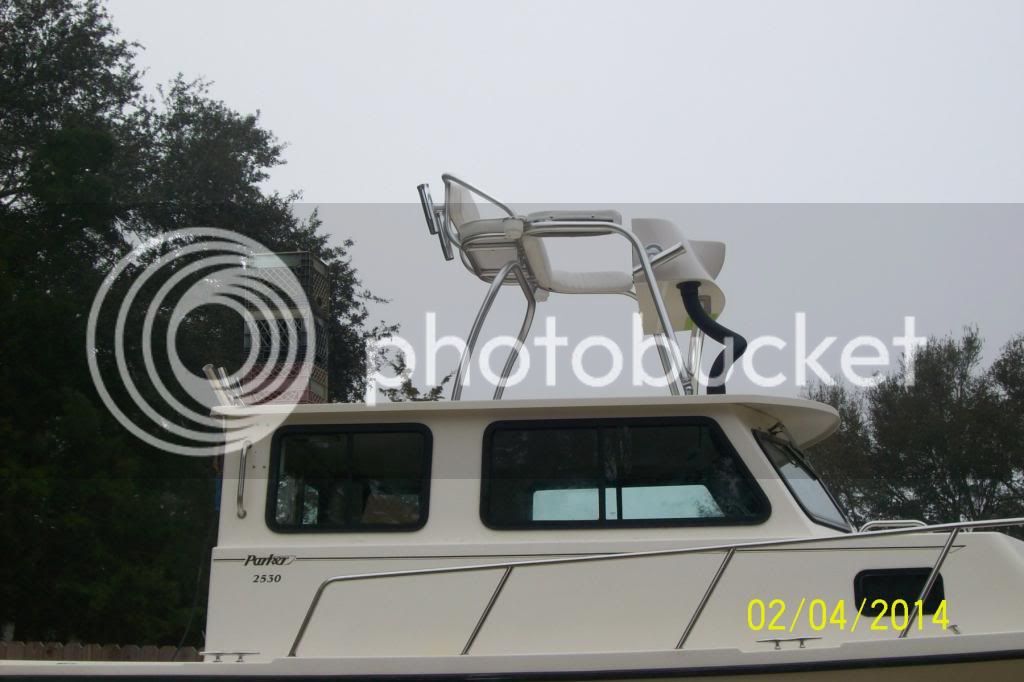
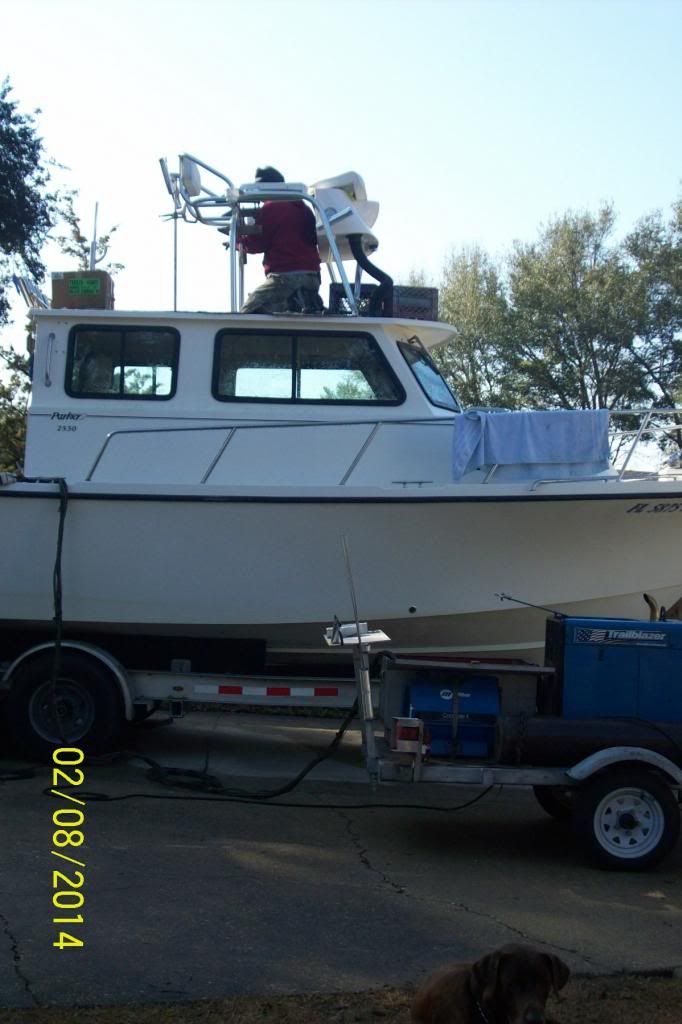
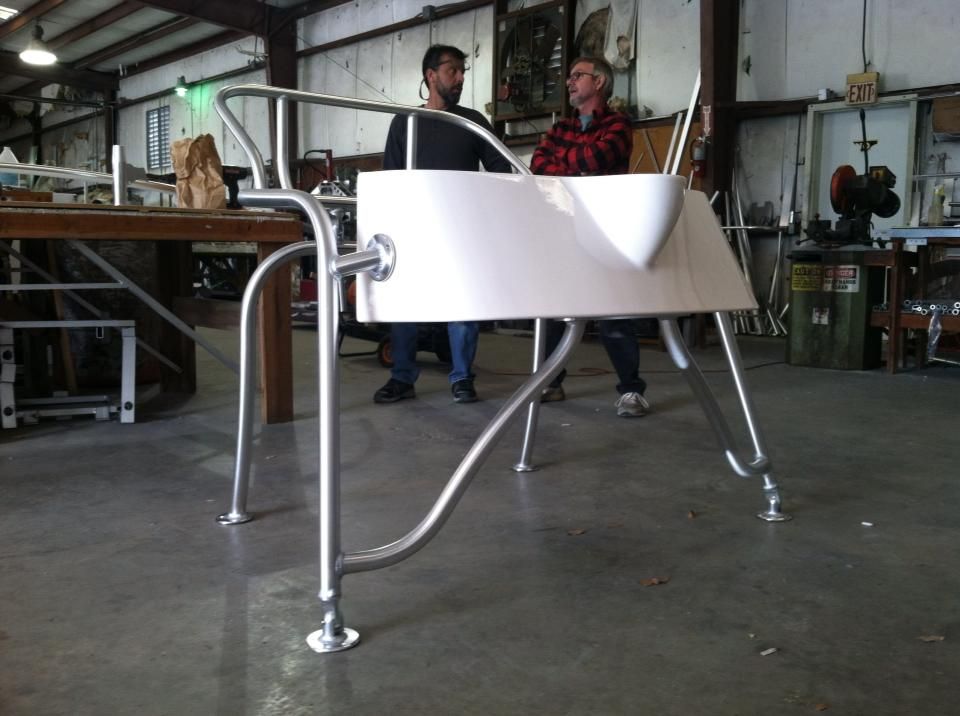
Doug on [L] Me on [R] discussing further plans on this Crow's Nest.

12358_3965700236628_1162925795_n_zps8e5e122a.jpg


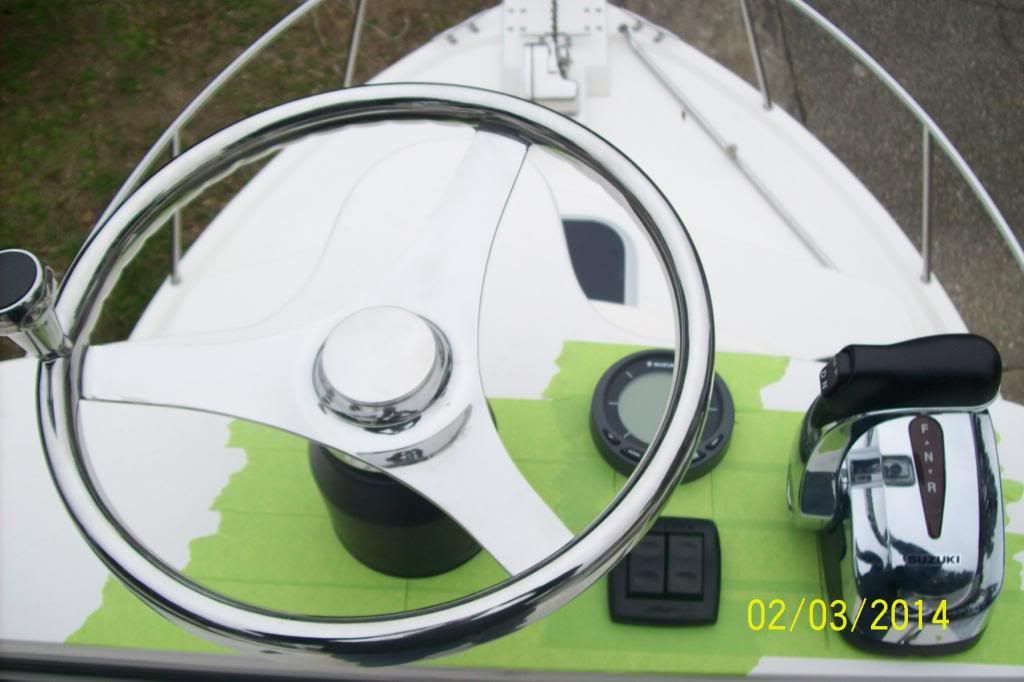
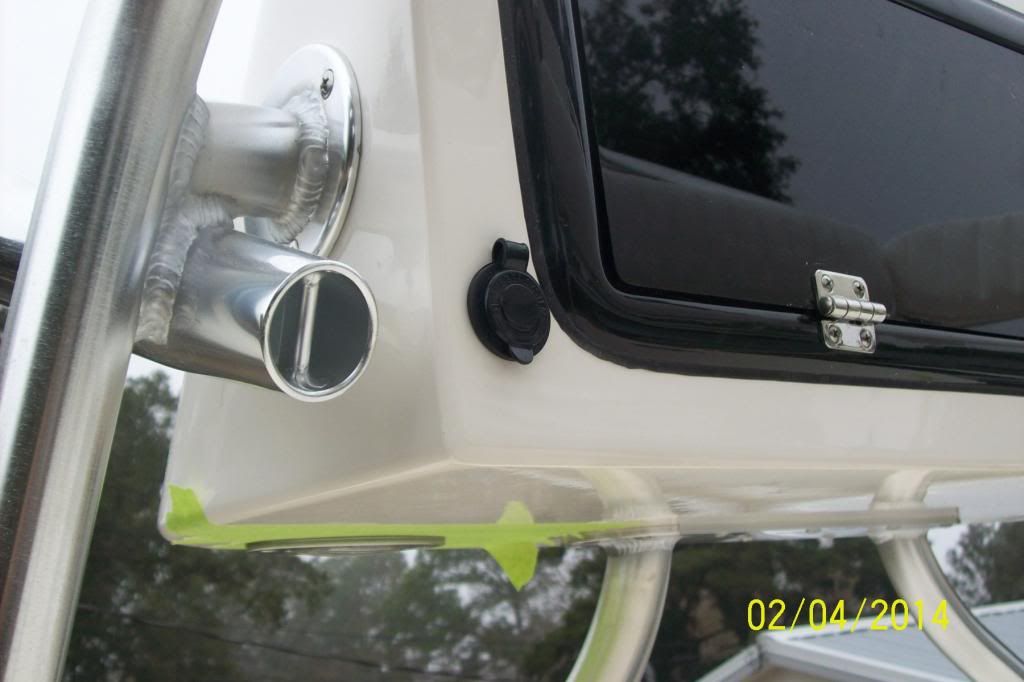
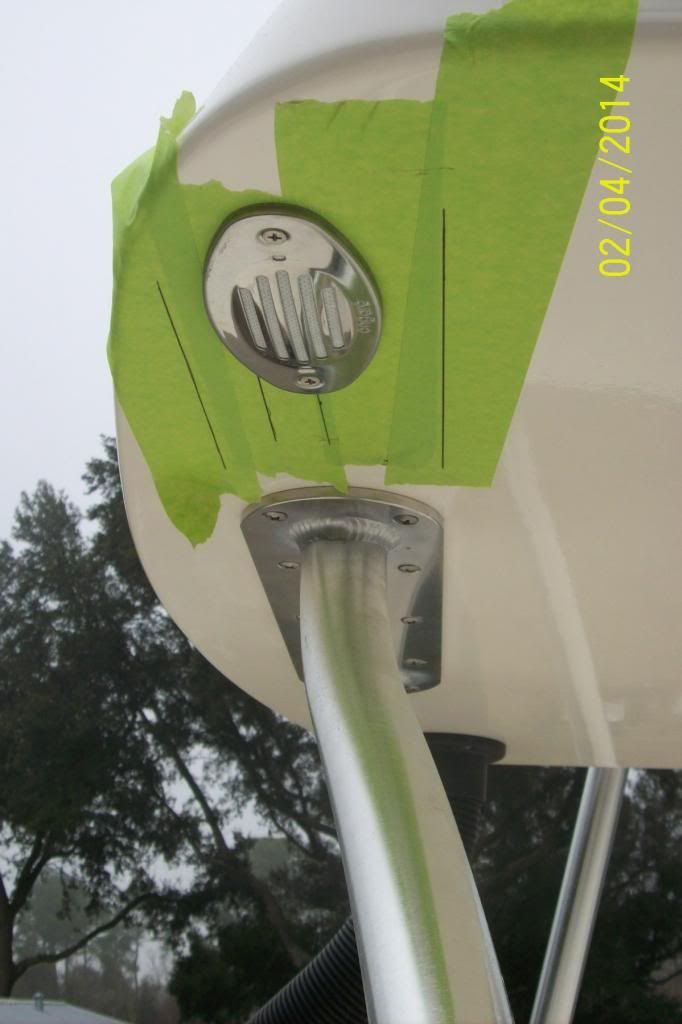
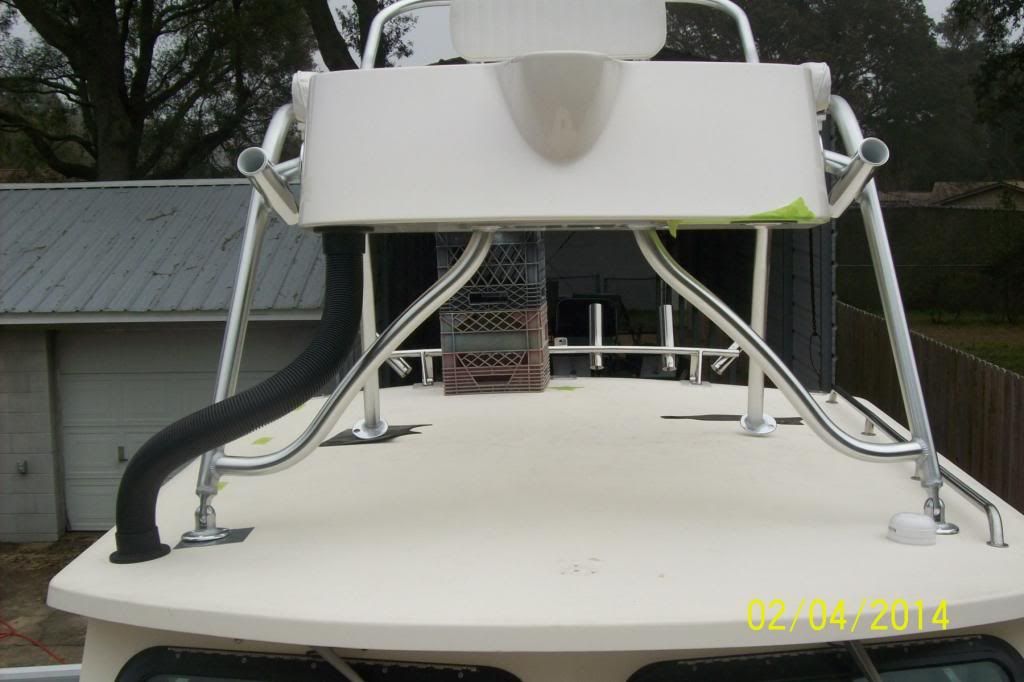
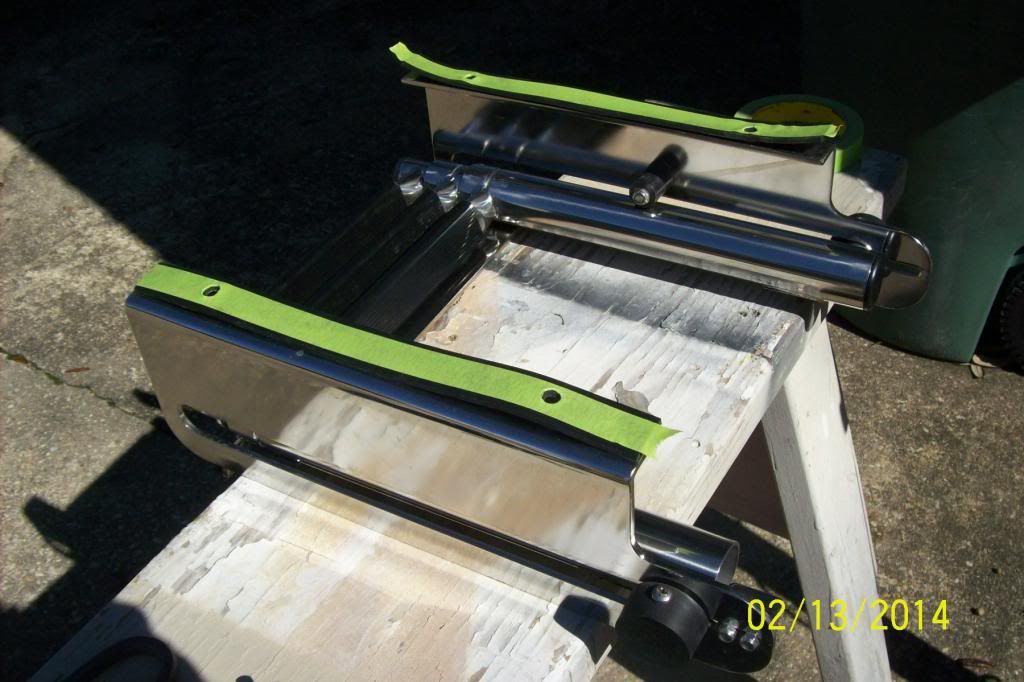
There will be 2 rod holders in the back. 2 Rod holders pointing out the front. 2 cup holders at the rear hip area.

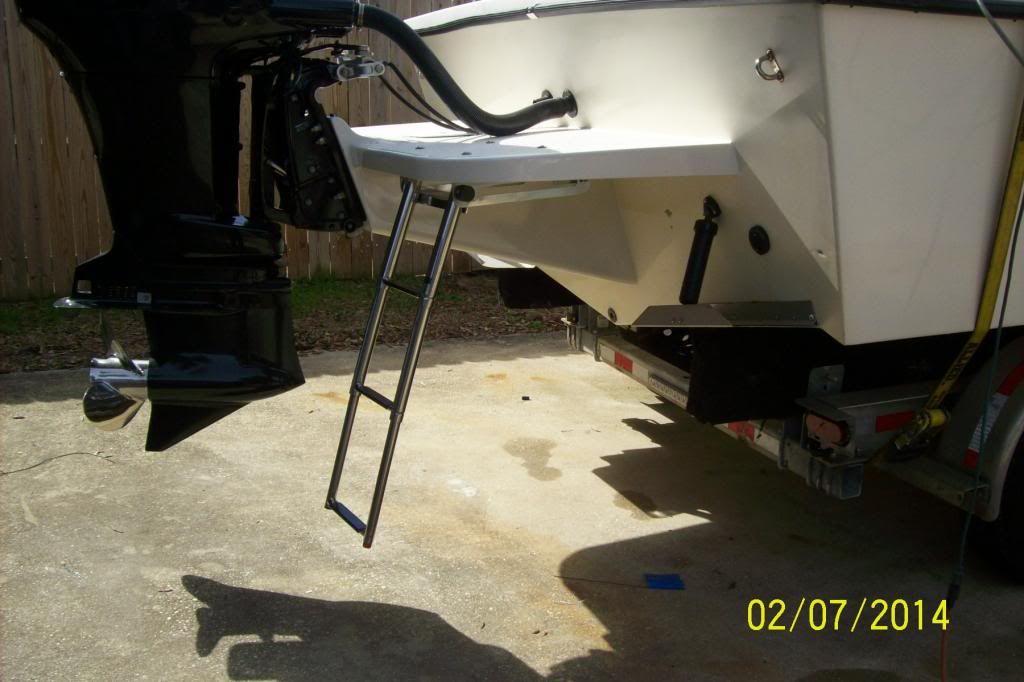
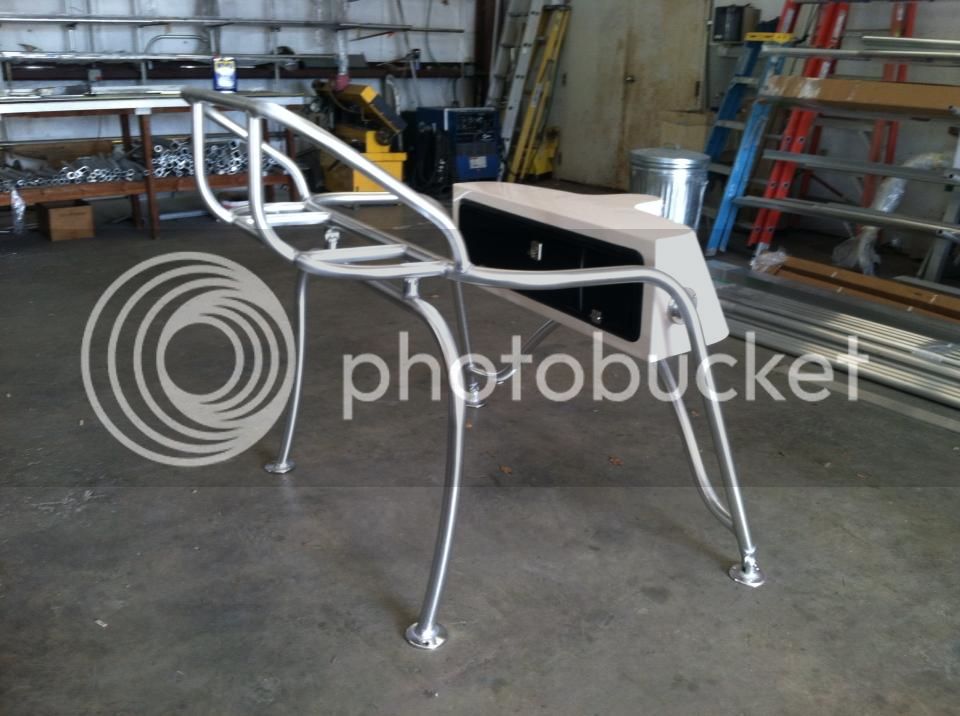
This unit folds down and has a total height of 36in.when folded. Waiting on upholstery also. Supposed to have it back by next Wed.

1004968_3965700036623_557621429_n_zpsd0e9b41c.jpg
 
This should entertain your Northerners as you sit bundled up by your fireplaces.

I got the Parker home from the welding shop [Blue Coral Towers] yesterday.

I've already started cutting on the boat again.

This is a 3 in. hole cut thru the hardtop. It is right where the foward most bolt went thru the top that held the handrail on.

The handrails will have to be moved.

100_5661_zps797354d8.jpg


100_5665_zpsd06af9c6.jpg


This is 3 pieces of 1/2in Black Starboard stacked to shim out the rigging tube flange. I'm using 2 1/2in rigging tube this time. Should make it a Hell'va
lot easier to rig, by having larger rigging tube.

You will note the imperfection in the hole drilling....It's not a imperfection. There is a lip on the flange that slides in that slightly larger hole 3 1/4in.

The hole going thru is 3in.

100_5663_zps52a1a1e7.jpg


100_5664_zps24b813f3.jpg


100_5666_zpsa8d2d65b.jpg


100_5667_zps75677f57.jpg


Using a 3/8in wide Rabbiting bit chucked in a die grinder I cut the core out as deep as the tool bit would allow.

100_5668_zpse3bb872e.jpg


The actual Balsa core is slightly less than 1/2in. [12mm] So a 1.2in rabbit bit is to wide. You just have to make a 2nd pass to clean it up good.

100_5669_zpscaa3b277.jpg


100_5670_zpsa4175cba.jpg


Then back filled with Epoxy/Cabisol mix.

100_5671_zps4883a389.jpg
 
Did you get a little too close to that blade Bobby? :shock:
Looks like you left a bit of your DNA behind!

Nice work. :wink:
 
It's not real easy maneuvering in that tight corner where the STB A-Piller is. You have to mark it and pilot it from the outside and run the holesaw from the inside. Then it's so thick that you have to break a hunk out of it to let the holesaw go on thru.

100_5672_zps250fd933.jpg


100_5678_zpsa1e671a8.jpg


Then building a custom Starboard piece because the area is smaller than the flange of the hose cuff.

100_5673_zps082837b0.jpg


100_5674_zps9f350d63.jpg


100_5675_zpsaabe4364.jpg


The alignment was so good that I was able to thread the hose in the bottom flange and right out the Top flange.

In the past I have used 2 shorter pieces of hose, but that creates a lip edge inside at the roof flanges and stuff can and will get hung up on it when your trying to run the rigging. So it's one contunious length from Top Flange to the Bottom flange. The did take some effort, as I bought 10ft of this hose and 8ft had to be threaded. That gave me some blisters on my hands.

d177bd96-8014-43f6-94d7-1b493f2ac808_zps86d93531.jpg
 
Wow. That helm area is one thick piece! :shock:
Love the way you finished off the tube ends. Very clean.
 
This is the part that is The most FUN. Drilling holes for all the new Goodies you bought. :D

There is still more.


100_5685_zpsca29e86c.jpg


100_5684_zps8b343b52.jpg


100_5683_zps06827bc6.jpg
 
A few more pieces added before it Started Misting and stuff was getting wet.

100_5690_zps3e490236.jpg


Power Port:

100_5691_zps911ea8d3.jpg


Horn:

100_5692_zpsb94ea902.jpg


And I got the last flange for the rigging tube installed.

100_5693_zps896a87a3.jpg


There will be some work done to the back legs....I'm not happy with that. I flipped it around to change the "Sweepy" angle that it made. As you can see that threw the flanges off, but stuff was going to be modified anyway.
 
Taking a Break from the Crows Nest for today.

Ladder Install. Used Button Head Allen Bolts on top, so feet wouldn't get cut on a Hex head bolt. Stainless isolated from the alum with Nylon washers and rubber isolator on the underside.


100_5699_zps927c49eb.jpg


100_5700_zps489f3c54.jpg


100_5701_zps8edf8596.jpg


100_5702_zps1dbafa50.jpg


100_5703_zpsdb9d252c.jpg


100_5704_zpsa94b94ad.jpg


100_5705_zps09c214a1.jpg
 
Nice clean install.
I wonder how this would work for someone like me who keeps the boat in the water. I wonder how that ladder would hold up being submerged a lot.
 
It'll get splashed while underway, but it's far enough off the water that it should be OK.
They do make a 3 step model that mounts up on top of the platform if you prefer.
That is the one I have.
 

Attachments

  • ladder.jpg
    ladder.jpg
    1.2 MB · Views: 431
A LOT going on this weekend. Some modification's were made to the Crows Nest that involved on sight welding. I wasn't happy with the rear legs. Yes all that "Swoopy" bends like fins on a New T-topped boat, but not a Commercial Style Parker. The lines were wrong and the guys had no problem making me Happy.

100_5706_zpsee427444.jpg


A custom Lil Panel to hold the secondary Fuse panel. Most would just screw it done flat. :( If it was flat, it takes up more room, bu t yo ucan't see the blown fuse if you need to.

That is the "Drop-In" Horn in the background.

100_5726_zpsbb960fec.jpg


The hole drilling on the outside is finished.......But they may be a Garmin 740 coming our way for up there.

100_5727_zps5b44687c.jpg


100_5728_zps65622cbb.jpg
 
I ordered a angled Bezel for the tack in Black. It will kick it on a angle to be easier to to read.

The boat has the Suzuki /Lowrance Multifunction gauges. That makes 3 tach's on the boat. LOL....Not really, because Iwhat stuffdisplayed and not have to jump thru menus.

It's getting a Bennett ATR also....Auto Tab Retract.
 
While the welder was there, he could have saved another trip and put in that wheel chair lift, or at least a hydraulic step ladder to the top. That's the lonely thing that's missing right now. :lol:
 
I finished the ladder install today, as well as some other stuff that got changed up.

This is how you isolate stainless from alum.....Armstrong engine brackets have gone to this now. Nylon inserts.

The 5/16in holes were drilled to 1/2in...The bushings were epoxied in the holes. Nylon flat washers under the stainless flatwahers and a strip of rubber between the stainless ladder and the underside of the bracket.

Then sealed with 4000UV

100_5731_zpsb7aa931b.jpg


100_5733_zpsc3aba1d0.jpg


100_5734_zps6e6c4ede.jpg
 
Back
Top