


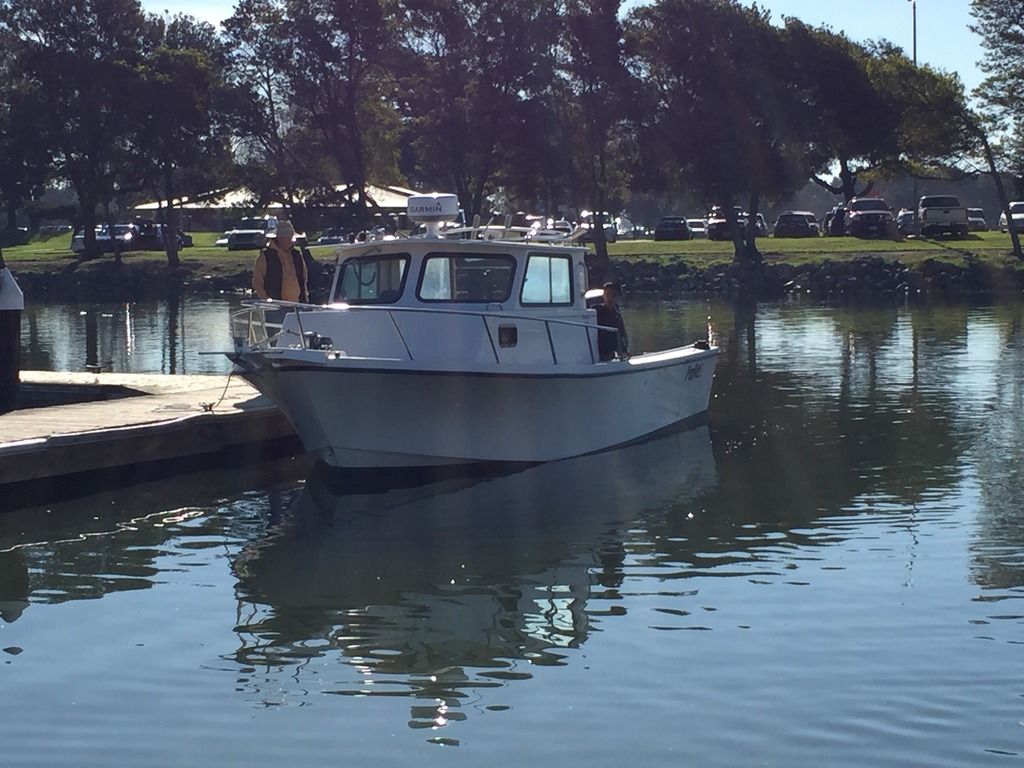
So I picked up this Parker 2520 out of New Jersey this past December after I sold my Grady White Overnighter. The Grady just wasn't a big enough boat for fishing 3 guys down in Socal for Tuna and Yellowtail (yes I got the fever bad!). It's got a 2006 Suzuki 250hp motor and gets the boat up on step nice and quick!
So as I learned the big deal down south is bait, and in hot bites the bait is NEVER cured so you get bait that was literally landed a few hours before it gets put in your tank. So the best thing to do is put the best bait tank in possible. One that gives decent current at all levels and can keep the bait swimming all in one direction.
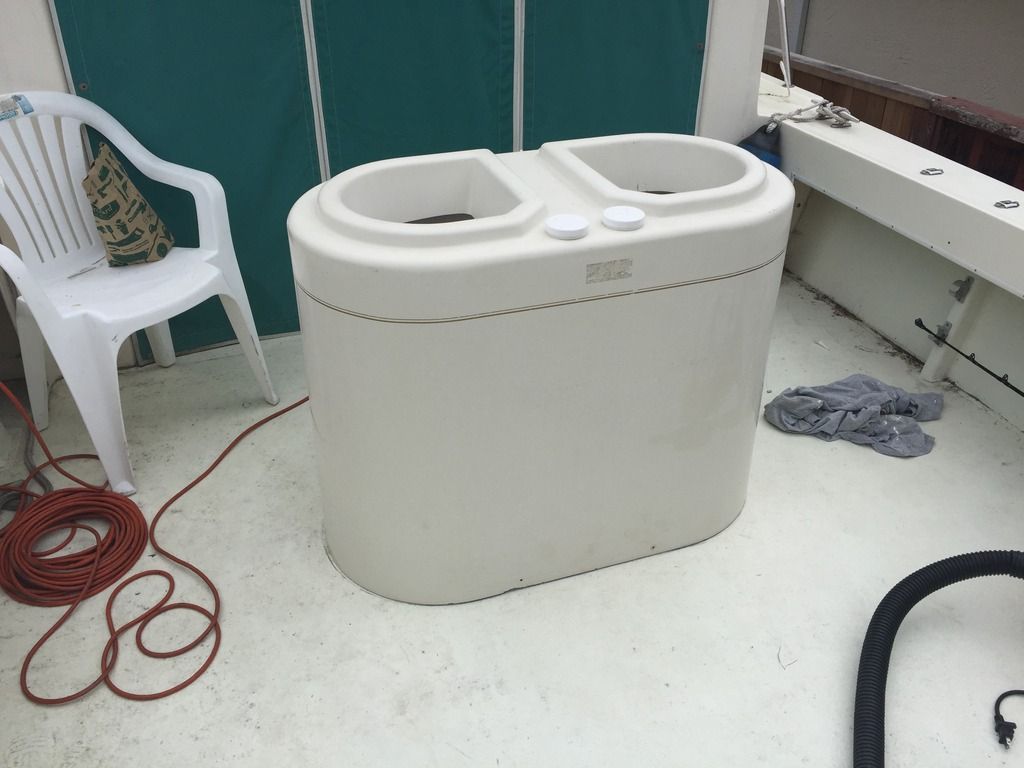
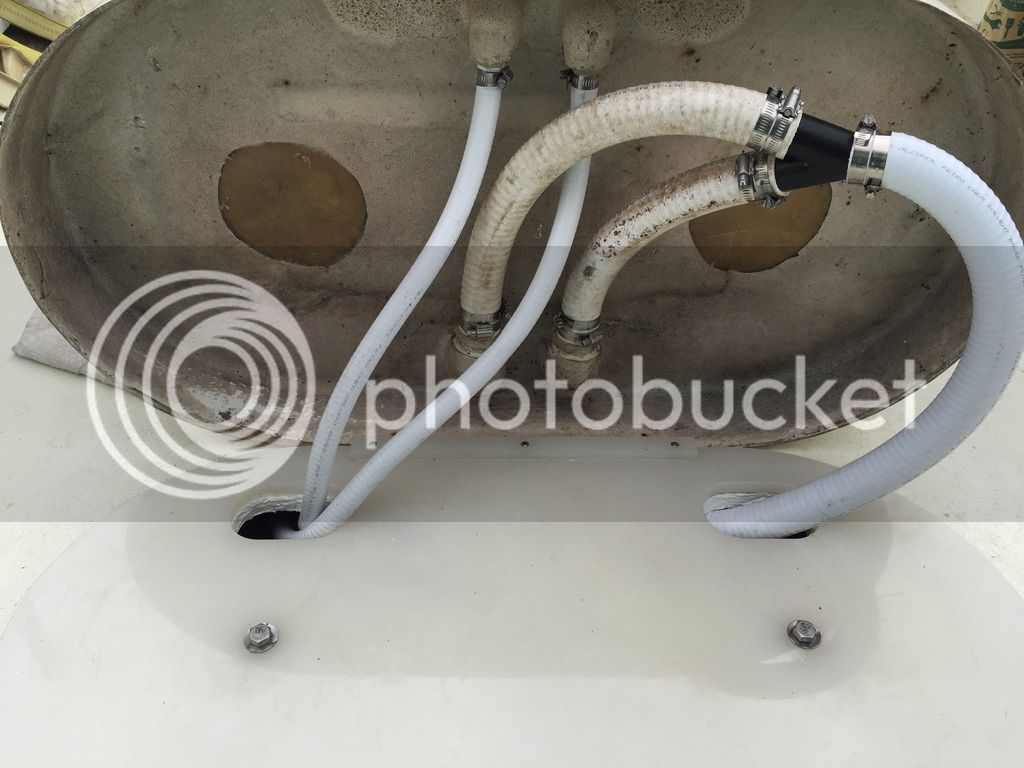
I picked up this Offshore 65 gallon split tank from a guy in Huntington Beach a couple months ago for a smokin price and finally got a chance to put it in a couple days ago. Thing I like about these tanks is the rigging is completely hidden under a false bottom, in between the deck and the bottom of the tank.
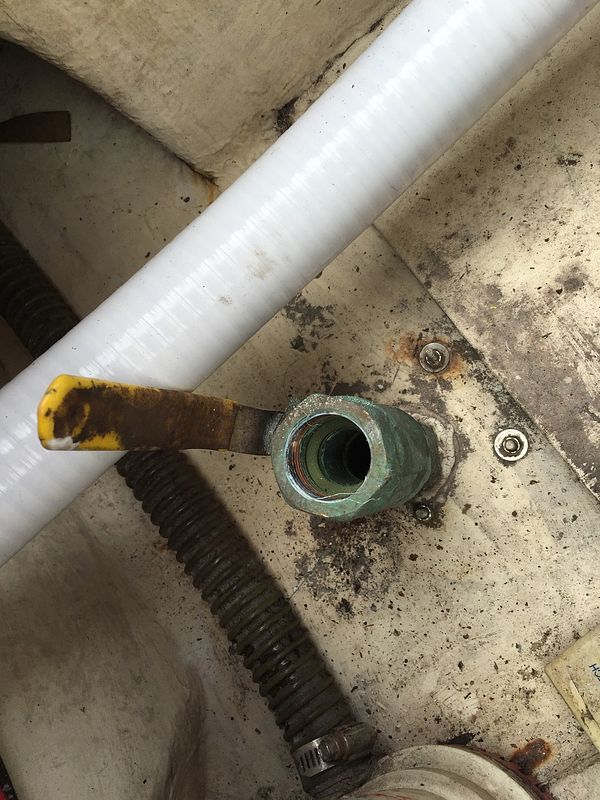
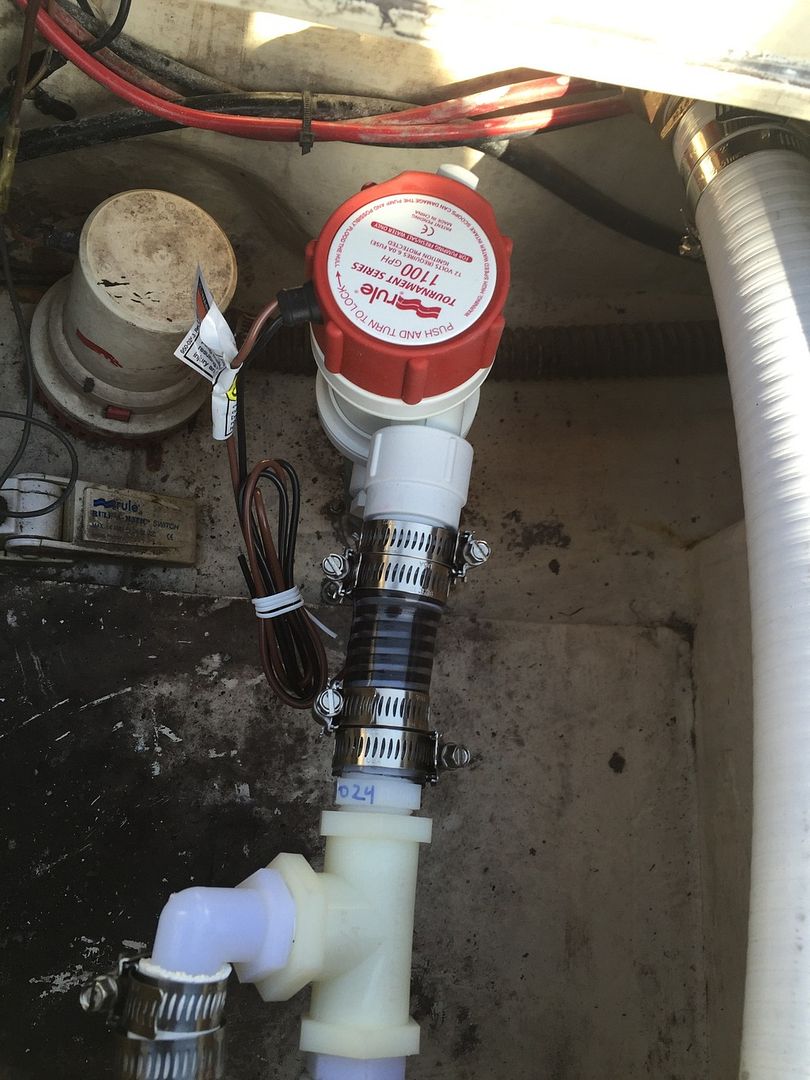
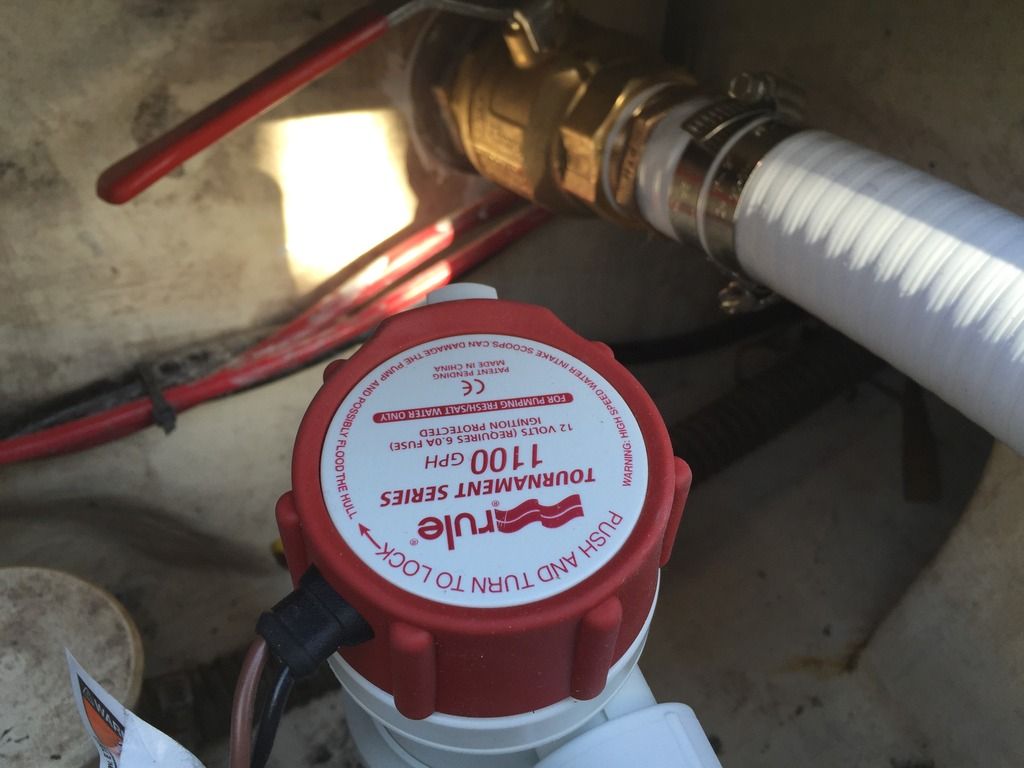
The boat was never rigged for a livewell but it does have a 1" thru hull for a washdown that was never rigged. So I yanked the 15 year old washdown pump, inspected the thruhull and bronze valve and replaced it with a Tournament series Rule 1100 gph pump and put a 1" to 3/4" reducer between it and the 1" valve.
Next order of business was to decide where to plumb the drain for the tank. I phoned Randy who runs Bluewater Bait Tanks (formerly Offshore) and he told me he's rigged hundreds of parkers with drains in the stern, below the waterline (as long as it is rigged right with a valve).
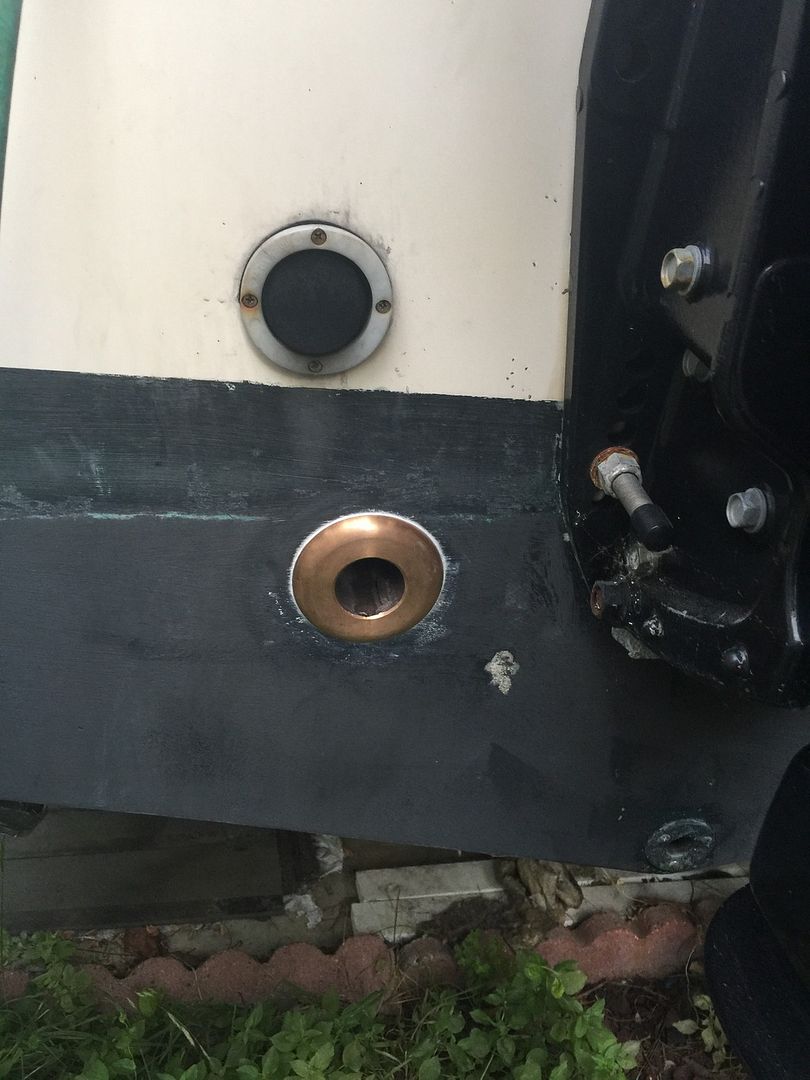
So I head over to the h/w store and pickup a 2" hole saw for the 1.5" bronze thru hull. I triple and quadruple check the location of where I want to drill the hole in the stern to make sure I can operate the valve without hitting anything around the bilge. Then I triple check it again lol. Finally I tape up the area to get drilled and start drilling.
Note: it's important that once you're about to make contact with the hole saw that you reverse the rotation of the drill so that it doesn't harshly chip the gelcoat. Once you've penetrated the outside layer of the gelcoat and you've got a smooth outline, then you can switch to clockwise rotation. (sorry no pictures, I was too busy stressing on getting the job done right).
So here I am thinking the stern was 3/4" to 1" thick. the hole saw bottoms out and I have to pull the bit and break away the portion that I had cut out. I had to do this three time before I cut all the way through to the other side. I am thoroughly impressed that Parker hulls were more than 2.5" thick.

I wasn't rushing to get this project done and was taking my time. Since I now had 2.5" of exposed transom wood, I covered the entire exposed area with 5200 fast cure. I let that set for 24 hours. Once cured, I installed the bronze thru hull by laying a bead of 5200 underneath the mushroom and pressing it into the transom.

Since I didn't have the correct thru-hull tightening tool, I slid a wrench into the hole and instructed my son to hold it still to prevent it from turning while I went into the lazarette to tighten the nut.
Note: I mulled over whether or not to install a seacock or just a thru hull with a valve and given the room I had, I felt the thru-hull and valve was better in this situation. If I had more room I would have installed a seacock.

Got it tight and put some teflon tape on the threads and screwed on the bronze valve and the barbed fitting.
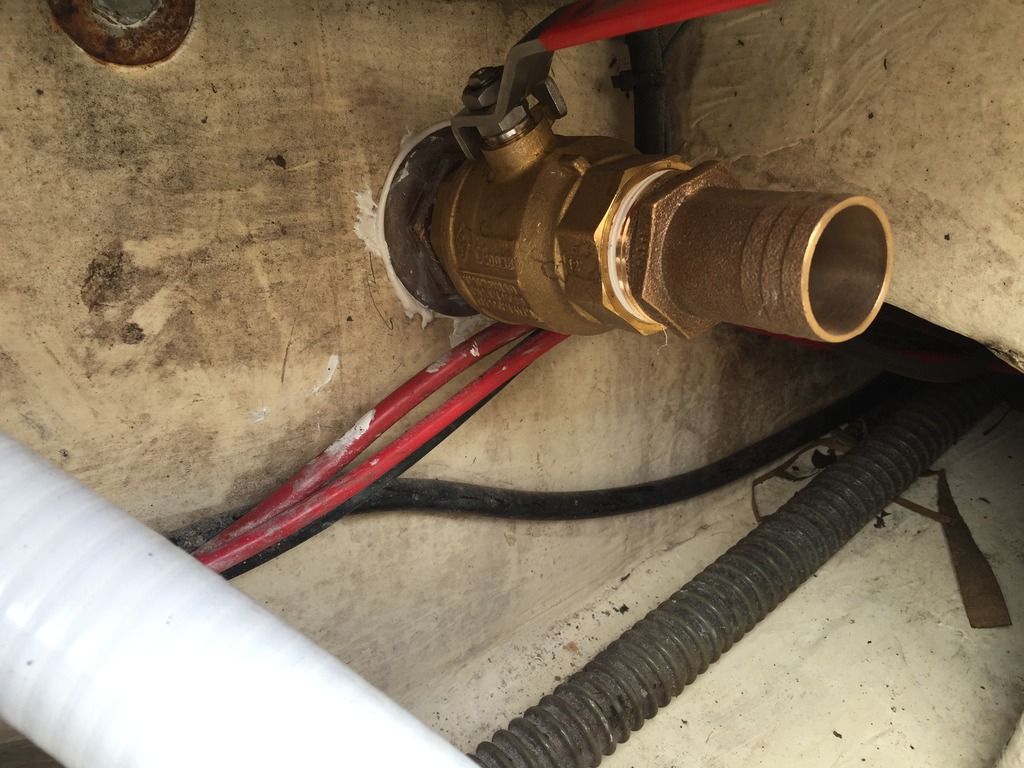
Finally done with the stressful part of the project. Now it's just putting it all together. Randy suggested using sanitation hoses as they are smooth walled internally and nice and thick and approved for under the waterline installations. He advised using a heat gun to soften up the hose a little before sliding it onto the barbs. I double hosed clamped everything for safety reasons.
From the pump I created a manifold in the case I ever want to close off one side or if I ever wanted to slow the flow on one side and increase it on the other for certain kinds of bait. Randy advised that PVC was ok to use for the manifold. Many many hose clamps used and potentially many points of failure, but it's out of the sun and I have a safety valve in case I have to shut things off.
Next is to get the tank positioned and the deck holes drilled. The person I bought the tank from had awesome seaboard base made. This is bolted to the deck floor and the holes drilled for the hoses to come through This is also what the tank bolts to when it's all said and done. Again, once I cut the deck holes for the hoses, I sealed the wood completely with 5200 fast cure to prevent it from getting saturated.
The plumbing it pretty straight forward, I ran the hoses from the rear up to the front of the deck and had my son grab the hoses as they came forward. It helps to slide something into the hose to keep it straight because it wants to curl up as your pushing it forward. I used a super long 18" ratchet extension. Used a heat gun to soften the hose a little and double hose clamped everything. I had to use a Y connector for the drain as it works a lot better than a T connector. This particular part is a little hard to find but most chandleries should be able to order it. Made by Whale.
Once everything was tightened, I closed the valves and filled the tanks halfway. Had to re-tighten several hose clamps as they had small leaks. Then I drained the tanks completely and then inspected the underside of the tank. Had 3 small wet spots and re-tightened those hoses. Re-filled the tanks again and repeated the process one more time to confirm all the leaks had stopped.
I bolted the tank down and sealed the perimeter base of the tank with clear silicon to prevent deck and rainwater from penetrating and sitting underneath the seaboard.
I've always been curious how these tanks were plumbed and now I finally know, decided to put up a writeup in case anyone else wanted to put one of these badass tanks in their boat. Not a hard job at all, just takes time if you want to do it right.
Now I just need to find time away from work to take the boat out and get some live bait to kill some halibut and stripers before the seasonal trip down to socal for TUNA!
So as I learned the big deal down south is bait, and in hot bites the bait is NEVER cured so you get bait that was literally landed a few hours before it gets put in your tank. So the best thing to do is put the best bait tank in possible. One that gives decent current at all levels and can keep the bait swimming all in one direction.
I picked up this Offshore 65 gallon split tank from a guy in Huntington Beach a couple months ago for a smokin price and finally got a chance to put it in a couple days ago. Thing I like about these tanks is the rigging is completely hidden under a false bottom, in between the deck and the bottom of the tank.
The boat was never rigged for a livewell but it does have a 1" thru hull for a washdown that was never rigged. So I yanked the 15 year old washdown pump, inspected the thruhull and bronze valve and replaced it with a Tournament series Rule 1100 gph pump and put a 1" to 3/4" reducer between it and the 1" valve.
Next order of business was to decide where to plumb the drain for the tank. I phoned Randy who runs Bluewater Bait Tanks (formerly Offshore) and he told me he's rigged hundreds of parkers with drains in the stern, below the waterline (as long as it is rigged right with a valve).
So I head over to the h/w store and pickup a 2" hole saw for the 1.5" bronze thru hull. I triple and quadruple check the location of where I want to drill the hole in the stern to make sure I can operate the valve without hitting anything around the bilge. Then I triple check it again lol. Finally I tape up the area to get drilled and start drilling.
Note: it's important that once you're about to make contact with the hole saw that you reverse the rotation of the drill so that it doesn't harshly chip the gelcoat. Once you've penetrated the outside layer of the gelcoat and you've got a smooth outline, then you can switch to clockwise rotation. (sorry no pictures, I was too busy stressing on getting the job done right).
So here I am thinking the stern was 3/4" to 1" thick. the hole saw bottoms out and I have to pull the bit and break away the portion that I had cut out. I had to do this three time before I cut all the way through to the other side. I am thoroughly impressed that Parker hulls were more than 2.5" thick.
I wasn't rushing to get this project done and was taking my time. Since I now had 2.5" of exposed transom wood, I covered the entire exposed area with 5200 fast cure. I let that set for 24 hours. Once cured, I installed the bronze thru hull by laying a bead of 5200 underneath the mushroom and pressing it into the transom.
Since I didn't have the correct thru-hull tightening tool, I slid a wrench into the hole and instructed my son to hold it still to prevent it from turning while I went into the lazarette to tighten the nut.
Note: I mulled over whether or not to install a seacock or just a thru hull with a valve and given the room I had, I felt the thru-hull and valve was better in this situation. If I had more room I would have installed a seacock.
Got it tight and put some teflon tape on the threads and screwed on the bronze valve and the barbed fitting.
Finally done with the stressful part of the project. Now it's just putting it all together. Randy suggested using sanitation hoses as they are smooth walled internally and nice and thick and approved for under the waterline installations. He advised using a heat gun to soften up the hose a little before sliding it onto the barbs. I double hosed clamped everything for safety reasons.
From the pump I created a manifold in the case I ever want to close off one side or if I ever wanted to slow the flow on one side and increase it on the other for certain kinds of bait. Randy advised that PVC was ok to use for the manifold. Many many hose clamps used and potentially many points of failure, but it's out of the sun and I have a safety valve in case I have to shut things off.
Next is to get the tank positioned and the deck holes drilled. The person I bought the tank from had awesome seaboard base made. This is bolted to the deck floor and the holes drilled for the hoses to come through This is also what the tank bolts to when it's all said and done. Again, once I cut the deck holes for the hoses, I sealed the wood completely with 5200 fast cure to prevent it from getting saturated.
The plumbing it pretty straight forward, I ran the hoses from the rear up to the front of the deck and had my son grab the hoses as they came forward. It helps to slide something into the hose to keep it straight because it wants to curl up as your pushing it forward. I used a super long 18" ratchet extension. Used a heat gun to soften the hose a little and double hose clamped everything. I had to use a Y connector for the drain as it works a lot better than a T connector. This particular part is a little hard to find but most chandleries should be able to order it. Made by Whale.
Once everything was tightened, I closed the valves and filled the tanks halfway. Had to re-tighten several hose clamps as they had small leaks. Then I drained the tanks completely and then inspected the underside of the tank. Had 3 small wet spots and re-tightened those hoses. Re-filled the tanks again and repeated the process one more time to confirm all the leaks had stopped.
I bolted the tank down and sealed the perimeter base of the tank with clear silicon to prevent deck and rainwater from penetrating and sitting underneath the seaboard.
I've always been curious how these tanks were plumbed and now I finally know, decided to put up a writeup in case anyone else wanted to put one of these badass tanks in their boat. Not a hard job at all, just takes time if you want to do it right.
Now I just need to find time away from work to take the boat out and get some live bait to kill some halibut and stripers before the seasonal trip down to socal for TUNA!