Spring 2013 Project time!

Classic Parker Boat Forum

Help Support Classic Parker Boat Forum:

This site may earn a commission from merchant affiliate links, including eBay, Amazon, and others.

Megabyte

Well-known member
Joined
Feb 16, 2006
Messages
10,553
Reaction score
11
Location
Lewes, DE
Well, spring has been struggling here in the mid Chesapeake region.
Air temps have been unseasonably chilly and the Bay water is still quite cold.
Air temp today is 52.5 with winds from the SSE @25kts. Water temp is a chilly 47 degrees. :shock:
http://www.ndbc.noaa.gov/station_page.php?station=tplm2

But... The sun is shining and tomorrow is supposed to be an even better day, so I went over to the storage lot at BOE Marine and took the shrink off.
 

Attachments

  • Shrink.jpg
    Shrink.jpg
    1.1 MB · Views: 593
  • No Shrink.jpg
    No Shrink.jpg
    1.2 MB · Views: 593
One project for this spring is to raise the motor at least 2 holes.

I had been watching Warthog5's thread where he was playing with motor height and props before he decided to re-power.
Bobby sent me a photo of his motor which I compared to mine today. Yep. Too deep.

I've always felt that my motor was way too deep, and one of the first thing I'll be doing is to raise it at least 2 holes.
 

Attachments

  • Megabyte motor.jpg
    Megabyte motor.jpg
    1.1 MB · Views: 592
I noticed in Mikeys thread that his logos had seen better days, and he was removing them for the 'slick look'.

I removed the pilothouse logos and the gold pinstripe several years ago when I installed the Lee Jr Outrigger bases (which covered the Parker logo).
The lower hull side pinstripes were also removed due to buffer damage over the years, so the only thing I have left is the Parker logo and my "Chesapeake Edition" addition.

Like Mikey, my logos have seen better days.
My original thought was to remove everything, compound and wax the hull to a bristol finish, then replace both sets of logos.
I might still go that route, but I want to see what she looks like 'naked' first, then decide.

This Parker logo isn't too bad, but the Stbd side is worse to to an errant buffer wielded by a helper. :(
Did you know that under that black Parker logo, the underlying decal is red?

Sun damage on my "Chesapeake Edition" add-on is evident.
 

Attachments

  • Rear view.jpg
    Rear view.jpg
    1.1 MB · Views: 591
  • Graphics.jpg
    Graphics.jpg
    997.1 KB · Views: 591
I got one side completed this weekend Kev. I had the same feeling as you I didn't know if I was gonna like it or not but I have decided I really like it, I think it makes the boat look a lot less busy.
 

Attachments

  • Parker decal project5.JPG
    Parker decal project5.JPG
    54.5 KB · Views: 1,357
gw204":36hk93jl said:
Looks to me like someone was tinkering with motor height before.

Yea. Never noticed that before, because I wasn't focused on it like I am now.
Since I'm only the second owner and I've never tinkered with it...
I'd love to know why he dropped it so deep.

Whatever the reason, she'll be fixed before she goes into the water.
 
Beautiful day today.
Sunshine, warmer temps, and best of all... no wind!
I think I should have worn my hat today tho. <ouch!>
My head is glowing. :shock:

First order of business was to remove all of the damaged decals.
I was using an 'industrial' heat gun, so cautions needs to be exercised...

Warm up the decal, then lift a corner with a fingernail.
If your fingers are burning, the heat gun is too close.
Use your fingers to gauge the amount of heat needed.
If you have the decal at the right temperature, it will easily lift off.
Too much heat and it will 'stretch'.
Doesn't take long to figure it out and the process goes quickly.

Once the decals were off, I washed the area with Acetone to remove any residual glue and wax.
If you look at the last photo, you can see the wax is gone, and the ghosting remains.

In my case, I still have not decided if I'm going to replace the logos or not.
Tomorrow I will compound the hull with a high-speed Makita and a wool pad and see what remains.
Who knows, I might just leave the ghost image (if it remains) and see what I think about it this year.
 

Attachments

  • Logos01.jpg
    Logos01.jpg
    357.2 KB · Views: 1,323
  • Logos02.jpg
    Logos02.jpg
    342.9 KB · Views: 1,323
  • Logos03.jpg
    Logos03.jpg
    321.7 KB · Views: 1,323
  • Logos04.jpg
    Logos04.jpg
    288.7 KB · Views: 1,323
  • Logos05.jpg
    Logos05.jpg
    291 KB · Views: 1,323
Last fall, when I took my boat over to BOE for winter storage, it was blowing 20 kts out of the east and was bone chilling cold.
By the time I got to Matapeake, the boat looked like a glazed doughnut with it's coating of salt, but due to the temps, I could not even give her a rinse before she got covered for the winter.

So... First order of business before attempting to compound and wax was a thorough wash with lots of soap, bleach, and plenty of water.

Clean and ready for the buffer tomorrow. :D
 

Attachments

  • Logos06.jpg
    Logos06.jpg
    360.5 KB · Views: 1,321
  • Logos07.jpg
    Logos07.jpg
    337.3 KB · Views: 1,321
  • Logos08.jpg
    Logos08.jpg
    384.5 KB · Views: 1,321
Funny sidebar...

Conversation overheard between an owner and technician in the lot today:

Owner, ...and please use all original Bayliner parts please.
Technician, Whatever you'd like sir.

I thought I was gonna pee myself. :roll:
 
Kev you got about the same shadowing that I had, I started with 220 grit wet sand paper and worked my way up from there right into the 3M compound which Bryan believes is probably equal to 1000 grit. Im gonna wait a few days and see if the image returns before I hit it with the fleet wax.
 
Mike... the 'red' compound that I use is a formulation used by my neighbor who owns a yacht management and detailing business.
He mixes it up in a restaurant type ketchup squirt bottle and thins it out with water.

I get my wool pads soaking wet (in a bucket), spin out the excess, then squirt the compound on and have at it.
I keep a squirt bottle with plain water close by and if the hull starts to get too dry, I spray it and keep going.
When the pad gets loaded up, I toss it in a bucket to soak for cleaning later and grab another.
That way the bad stuff doesn't get ground into the hull. The water suspends the bad stuff, and the wool captures it.

I'll take photos tomorrow.
 
I think you'll find that shadow will almost completely disappear after a good compounding and wax. This was my '93 Grady after pulling the stripes, and hitting the hull with Meguiar's 3-part fiberglass restoration kit. No wet sanding required.

IMG_7098.jpg
 
Todays workout... Arms, back, chest, abs, and legs.
The tool: One Makita 9227 variable speed polisher weighing in at 6.6 pounds, and in use for 7 hours today on the hull. :shock:
 

Attachments

  • Todays workout.jpg
    Todays workout.jpg
    308.7 KB · Views: 1,245
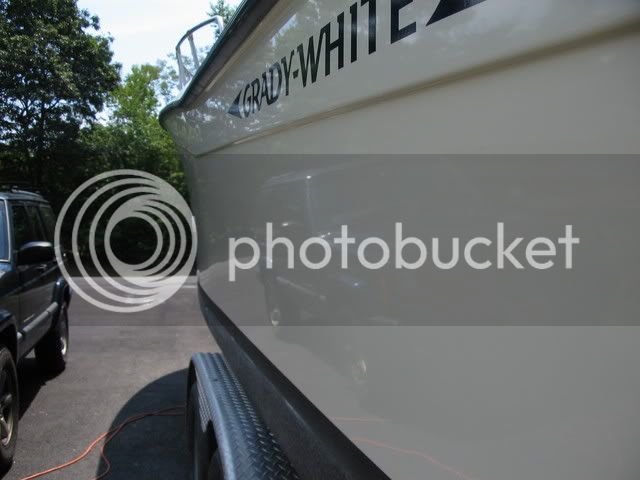
Kev how did the decal spot come out? Id like to compare to mine, im still tinkering with mine its not to my satisfaction just yet.
 
Todays start...

Soak wool pads in a bucket with a second bucket for the dirty pads.
First order of business, eliminate the ghost where the old logos resided.

The tool: A Makita 9227 with a wool pad (with the excess water spun out) and a ketchup bottle loaded with compound.
After one pass, the ghost has been eliminated.

Compound was then followed up with an application of cleaner wax.
The ghost is there if you know where to look and run your fingers over the area, but it is even difficult to see from a foot away.
 

Attachments

  • 09Apr 001.jpg
    09Apr 001.jpg
    468.3 KB · Views: 1,239
  • 09Apr 002.jpg
    09Apr 002.jpg
    331.7 KB · Views: 1,239
  • 09Apr 003.jpg
    09Apr 003.jpg
    291.2 KB · Views: 1,239
  • 09Apr 004.jpg
    09Apr 004.jpg
    306.2 KB · Views: 1,239
  • 09Apr 005.jpg
    09Apr 005.jpg
    304.9 KB · Views: 1,239
One pass over the hull with compound followed by a pass of cleaner wax.
Tomorrow, the hull gets two coats of polish with PTFE (if my body holds up).
 

Attachments

  • 09Apr 006.jpg
    09Apr 006.jpg
    1.2 MB · Views: 435
miky2884":d487wkgb said:
Kev how did the decal spot come out? Id like to compare to mine, im still tinkering with mine its not to my satisfaction just yet.

Photos aren't the best... but can you see anything where the logos used to be? :)

Edit:
My process is similar to yours.
Where you have been wet sanding, I am using a watered down red compound on a wool pad.
Similar technique, but I like the ability to massage the surface using the buffer, and adding water and compound as needed.
The buffer is also softer and makes it easy to 'massage' an area, which is something you can't really do when block sanding.

Similar techniques, just using different tools and methods.
 
Sign of the season... I spent about 8 hours today compounding my 2110 hull/cabin tops and rear deck area. I use an inexpensive (Harbor Freight) dual action variable speed 6" buffer and for the first time I'm using Yacht Brite compound and polish. The manufacture claims that the compound is starts off as a heavier grit which breaks down during use to a finer grit. Gotta say that both products worked as advertised. At this rate, I hope to be in the water in a week or so. :D
 
Photoguy":13cl6990 said:
Sign of the season... I spent about 8 hours today compounding my 2110 hull/cabin tops and rear deck area. I use an inexpensive (Harbor Freight) dual action variable speed 6" buffer and for the first time I'm using Yacht Brite compound and polish. The manufacture claims that the compound is starts off as a heavier grit which breaks down during use to a finer grit. Gotta say that both products worked as advertised. At this rate, I hope to be in the water in a week or so. :D

Photos required brother ! :)
 

Latest posts

Back
Top