After 2 years searching for the right boat and the right deal, 2 months of prep and rigging, she's finally here!
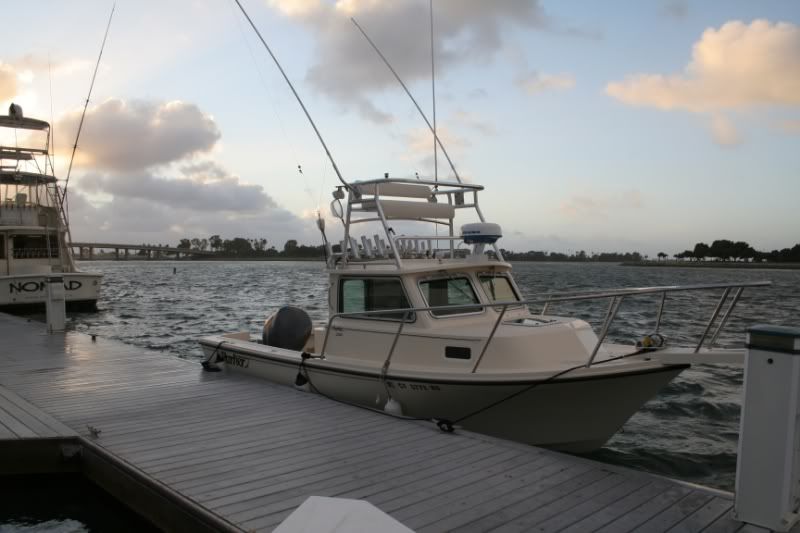
Just took delivery of our new 2008 2120 "Barely Legal" (named for my wife who is young, beautiful, and studying very hard in law school, for the size of fish and lobster I usually catch which have size restrictions, for our little 21'er who'se just big enough to go offshore for the pelagics, and for....um, nevermind.... :wink")
So here's a more or less bow to stern tour:
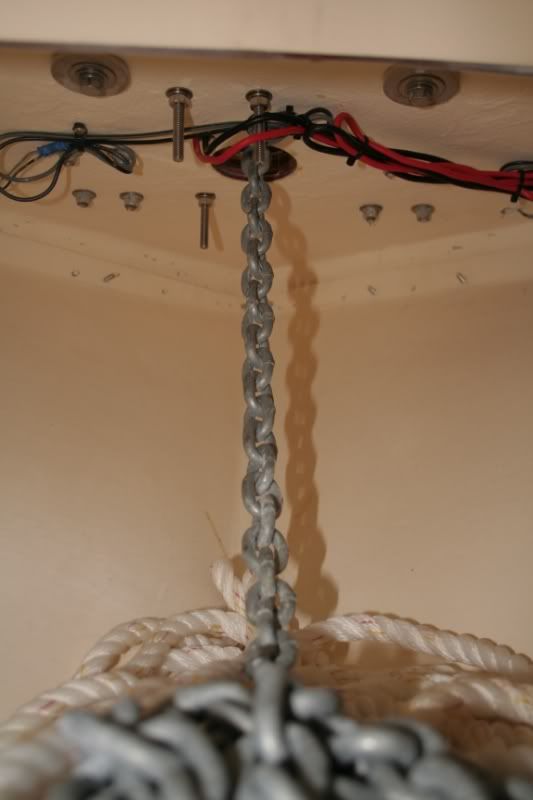
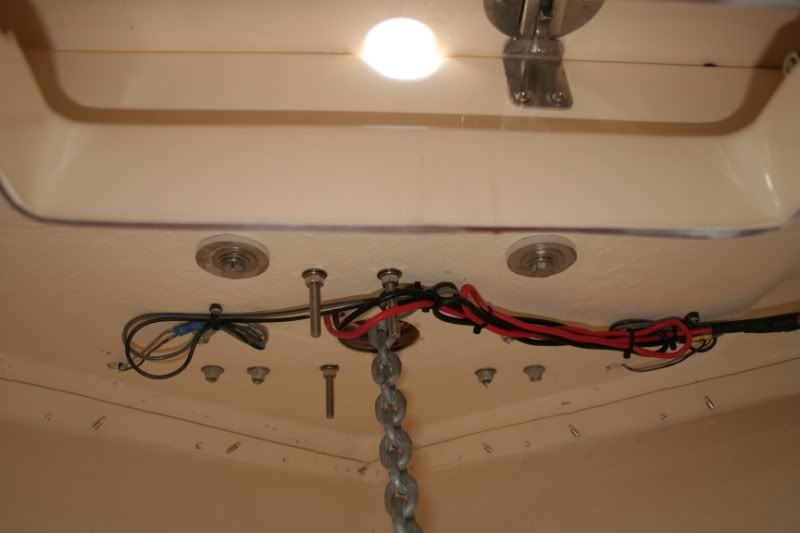
Inside the anchor locker, the underside of the windlass installation. Anybody have any luck with using some kind of lining inside here to protect the inside hull from getting banged up by the anchor chain and to dampen the tooth jarring chain rattling when cutting through the chop?
Another shot of the anchor locker showing the hawse pipe (which is really just a hole in the bow) and the original anchor locker door with hole for the rode which is no longer needed. Should the new hole have some kind of metal hawse pipe liner or is it ok as is? I'm planning to insert something to plug the original hole in the anchor locker door that I don't need like I saw another CP user do to help keep his bilge meticulously clean and dry.
Here's underside of the dash with all the electronics installed. Extra wiring for the windlass, Furuno 1724 radar/gps/sounder combo display and the Furuno DFF1 sounder module can be seen here.
Those smudges in the top left across the curtain track is what's left of a mud dauber wasp nest that was built over last summer while the boat was sitting in the dealer's overflow lot waiting for someone to take her home. I still need to get in there with cleaner and a toothbrush to get the last bits of that out of there.
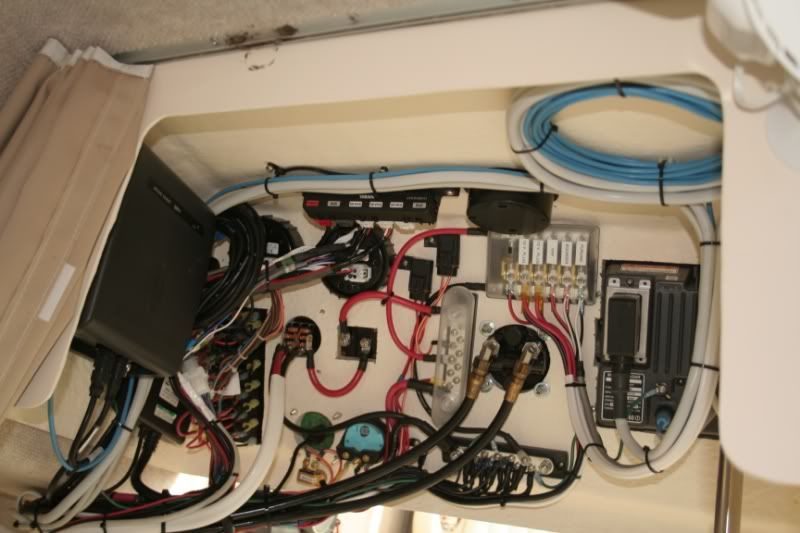
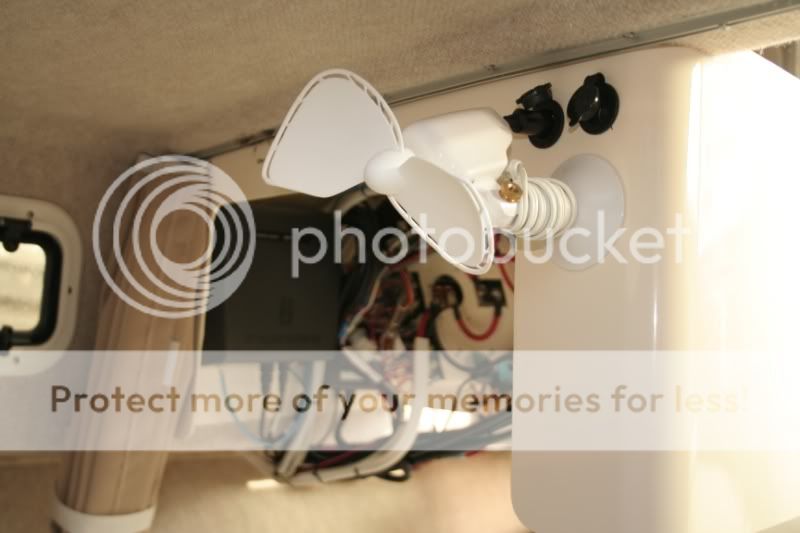
The electrical installer hooked me up with a couple of extra 12V outlets; one of them presently used to power my 12V fan AKA "the whirling blades of death".
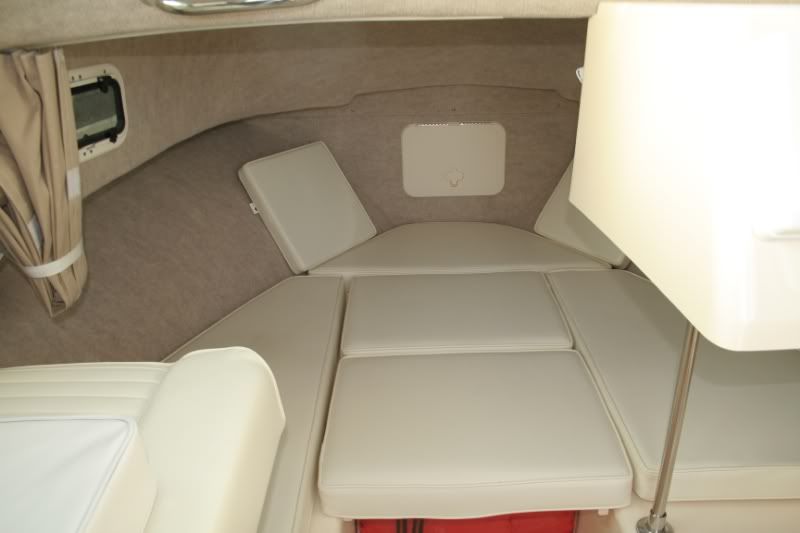
Here's a shot of the V berth showing the port-a-potty and storage for extra life jackets and stuff.
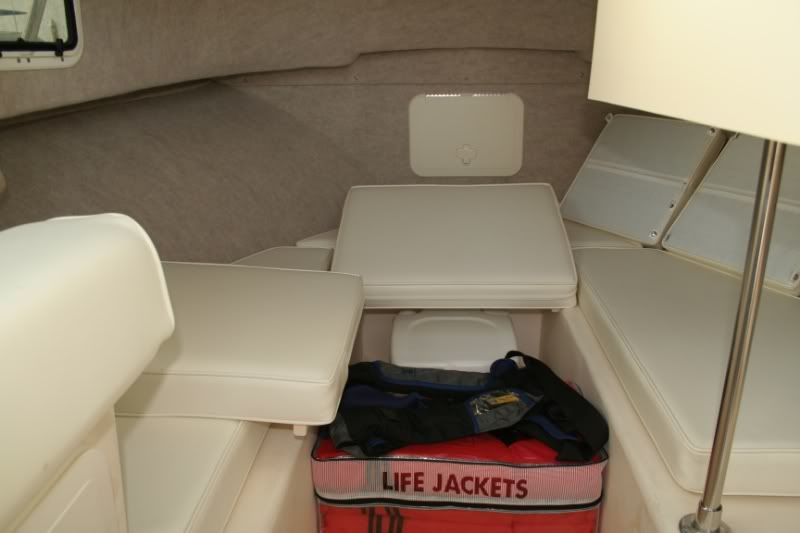
With all the cushions in place, a veritable pasha palace.
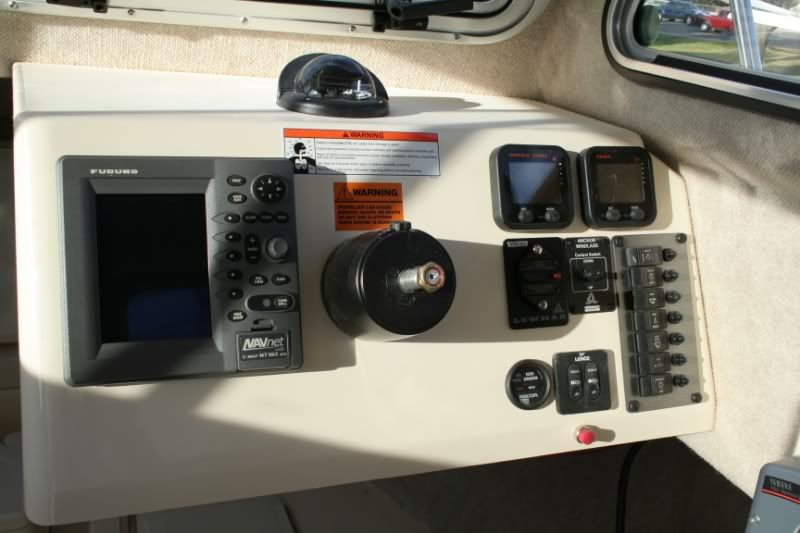
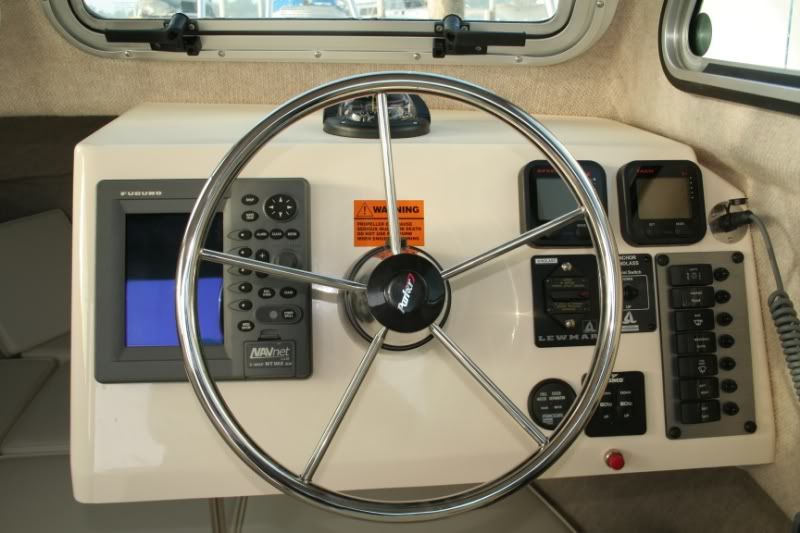
The business side of the helm. There was a big temptation to install the Furuno display as high as possible along the top edge of the dash, the top edge even with the top edge of the Yamaha speed and tach gauges. But, I noticed some other installations that put the display close to the top edge got quite hot. I had mine installed just a little lower to give some extra airspace and it does seem to stay cooler that way.
The windlass controls are lined up with the top edge of the switch panel and the side of the Yamaha speed gauge.
To get all the electrical switches I needed to fit within the available switch panel, we doubled up the factory cockpit light switch on one side of a double throw rocker with my add-on spreader lights on the other side. The cockpit lights don't really add much with the spreader lights on, so there isn't much reason to need them on separate switches so they could both be on at the same time. This freed up a switch space so I could have a separate switch for my washdown pump and my bait tank pump.
The top right corner of the dash has a plug installed for a remote VHF mic.
The factory installed that red horn button directly under the trim tab controls. I found holding on to the bottom edge of the dash with one hand is a good way to help steady myself while running through tough chop. If that horn button were moved to the left under the racor indicator I think it would have looked better and it would leave a clear spot to hold on to the dash just below the trim tab controls so you could keep yourself steadied and operate the trim tab controls with your thumb without that horn button in the way. Oh well, I guess if these are the kinds of nit-picky details I'm left to complain about, life is good!
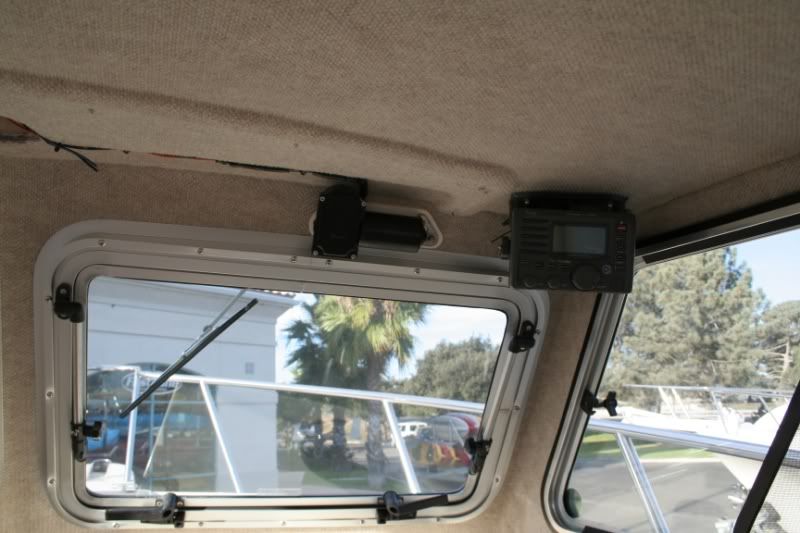
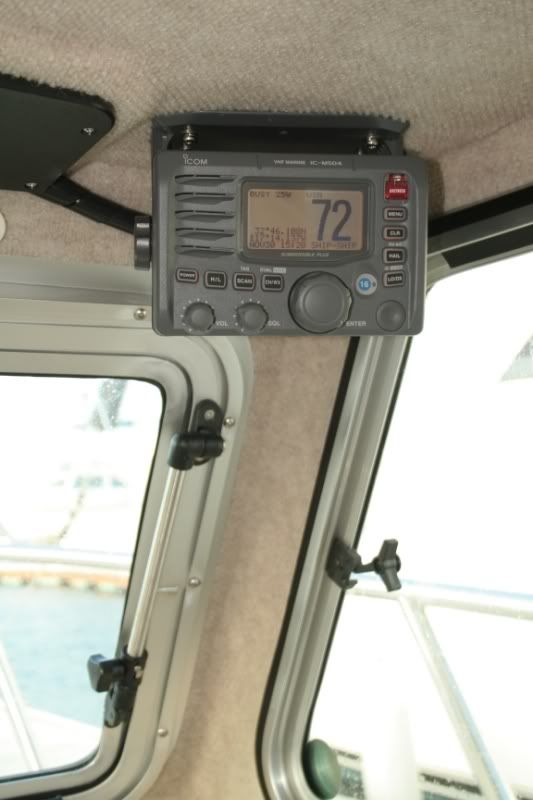
Here's the location of the Icom 504 VHF, the remote mic feature keeps it clean with no mic cords hanging down in the way. In my original spec to the dealer, I listed the Icom 402 VHF but the dealer gave me a free upgrade to the 504. I really appreciate the extra features of the remoted mic and the additional display features giving me a constant display of time/date and position. There's a lot of other really cool things this versatile VHF can do. If you're in the market for a new radio, you should definitely consider spending a few extra bucks for one of these.
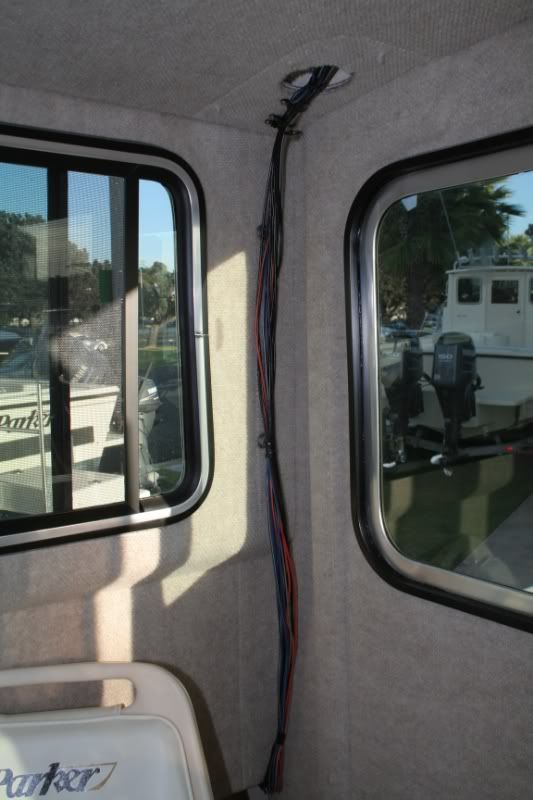
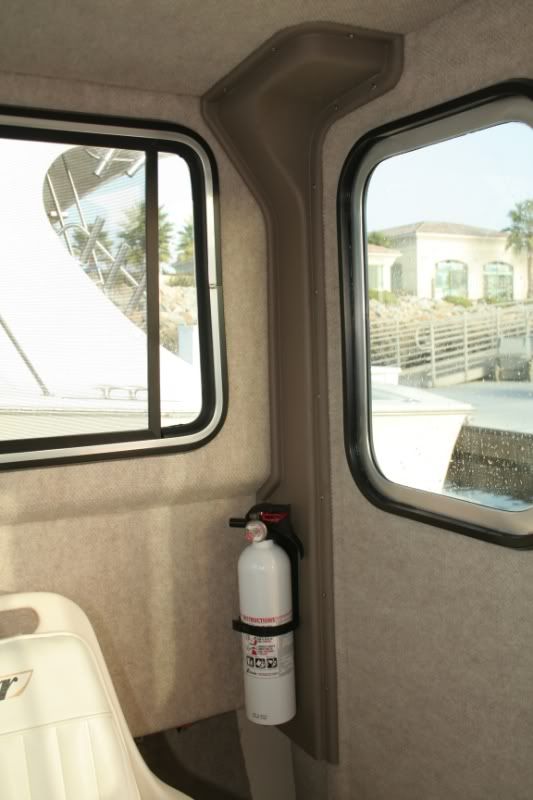
I think around 2007 or 2008 Parker started putting in these moldings in the corner which make it really easy to run wires from the pilot house roof to the main harness and keep the installation looking very clean and sano. It also makes a great spot to mount a fire extinguisher.
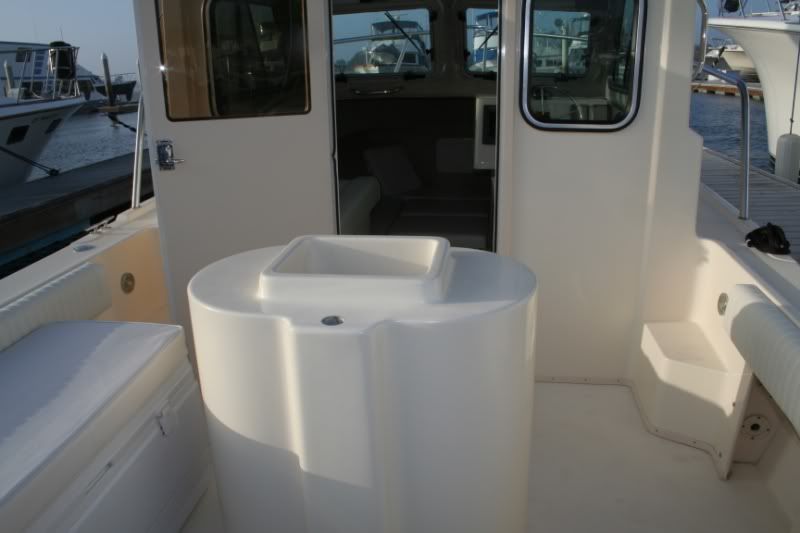
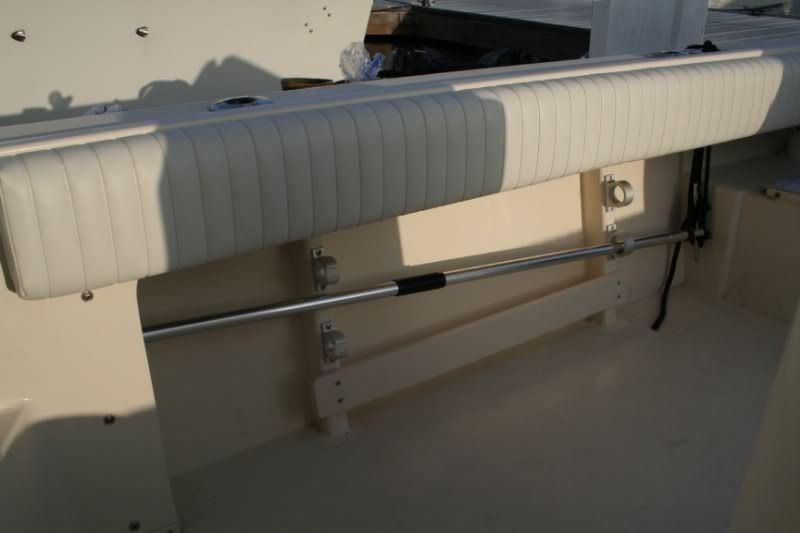
Here's a shot of the cockpit showing the combination cooler/padded lounge, coaming pads and bait tank.
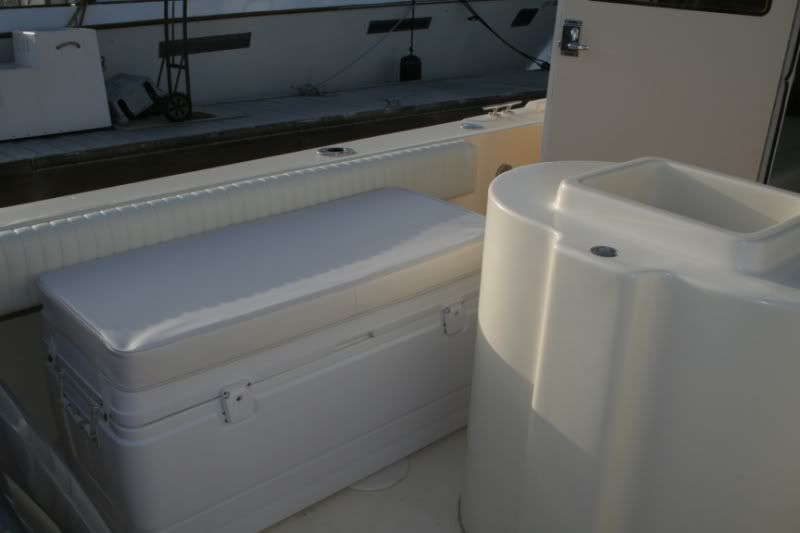
The Pacific Edge 48gal bait tank in all its glory
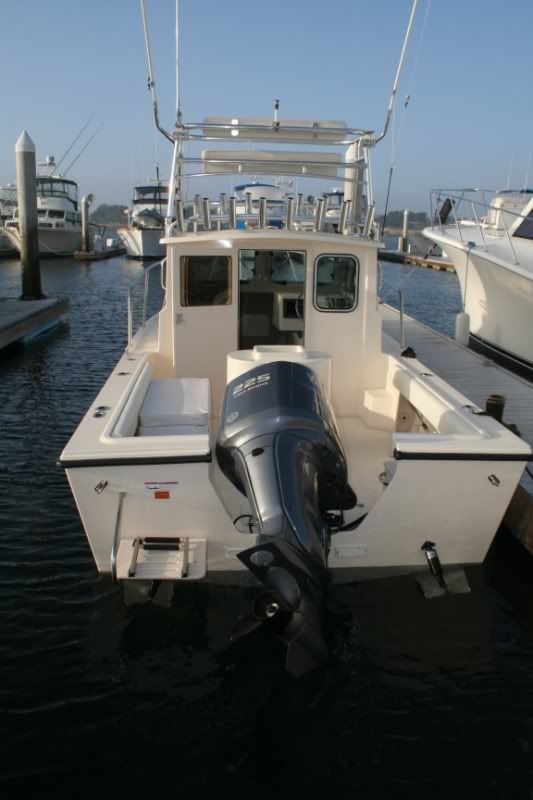
There have been many threads debating whether to go with the F150 or move up to the F200 for the 2120. In keeping with the "Barely Legal" theme and pushing everything to the limit, this one's maxed out with the Yamaha F225 4 stroke!
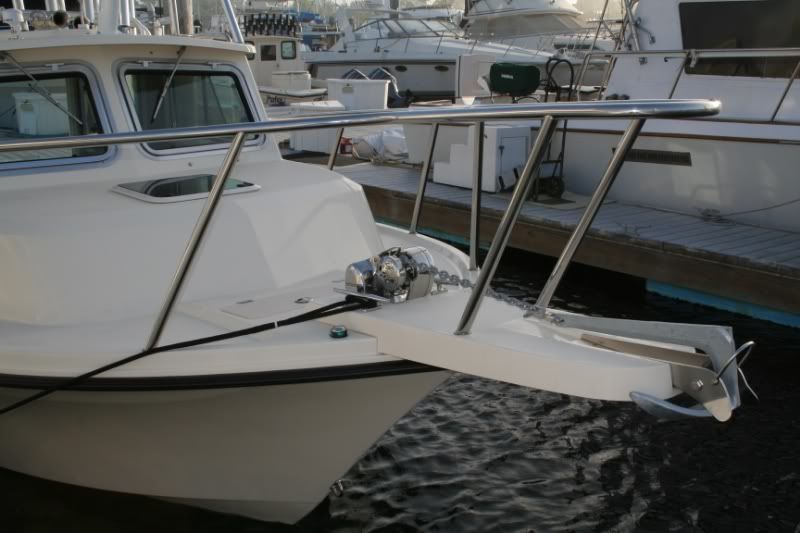
View of the bow with the Lewmar 700 Pro-Fish Free-Fall windlass.
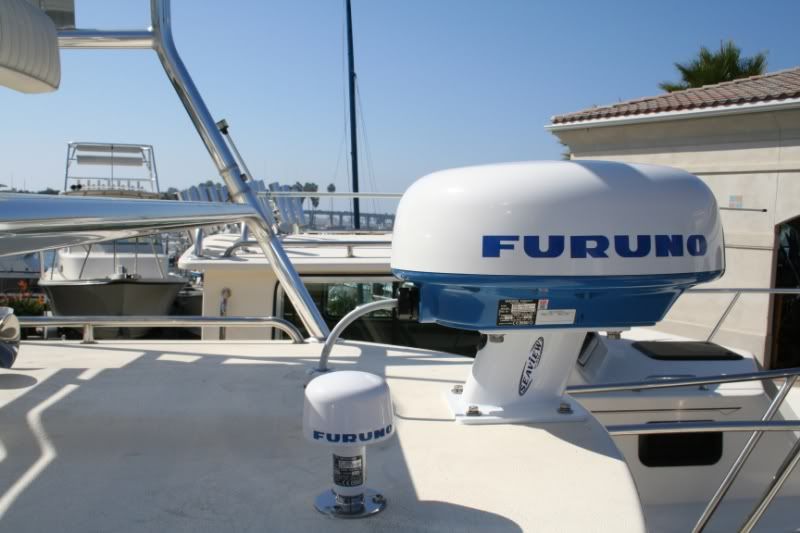
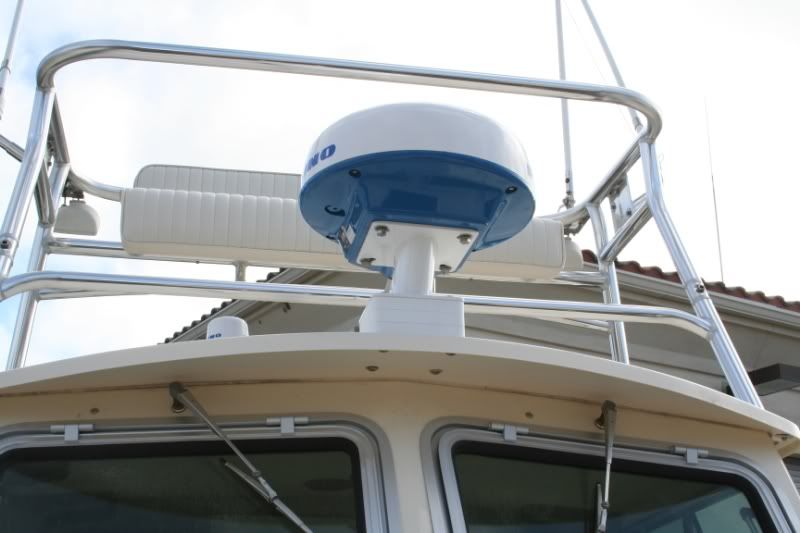
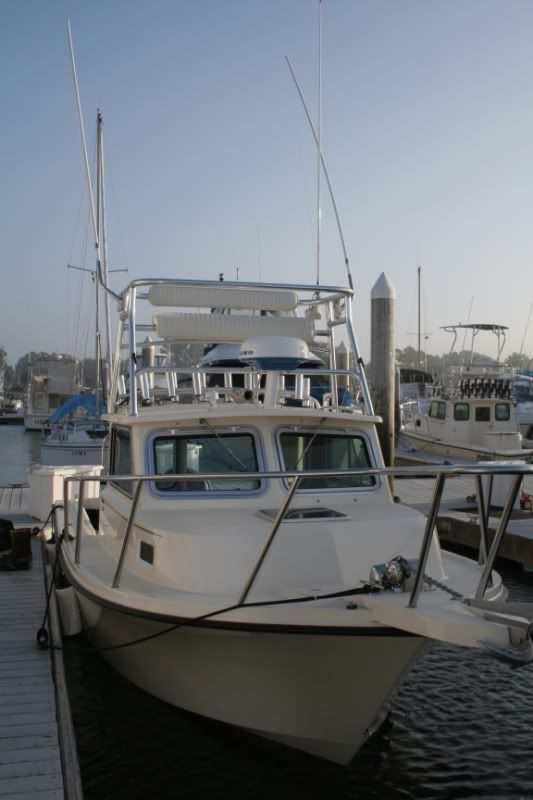
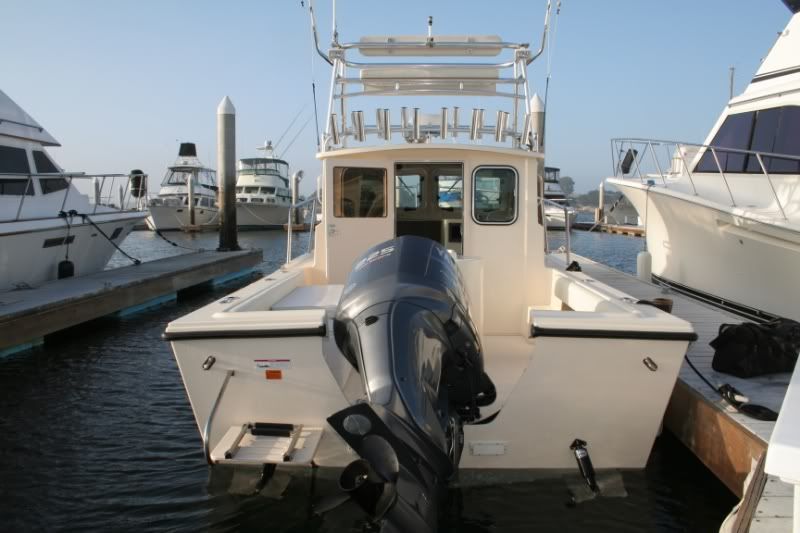
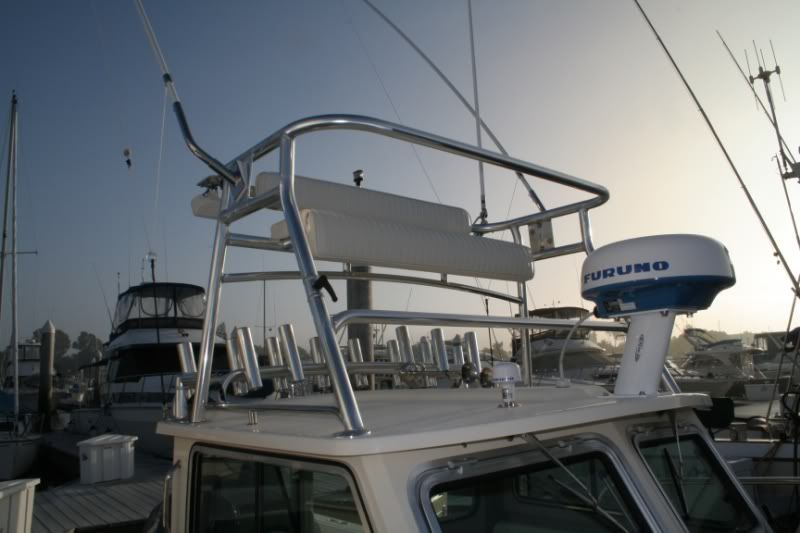
Another view of the front showing the Mariner Enterprises 1/2 tower conversion, the Furuno radome on 10" seaview mast, Furnuno GPS, outriggers, and 14 rocket launcher rod holders along the back edge. The 8' Digital VHF antenna is up on a pad on the tower to give it as much height and unobstructed space as possible.

It took a few tries to get it right, but the 10" radome mast worked out perfectly to give the radome a clean shot over the tower footrest bar and rocket launchers, but stay under obstruction from the bench seat. The first go was a 5" mast which put it directly in line with the footrest bar. Some starboard was used to build up a platform to raise the mast up about 3", but that just looked nasty. Finally, switching to the 10" mast, which was originally thought to be too tall, worked out perfectly.
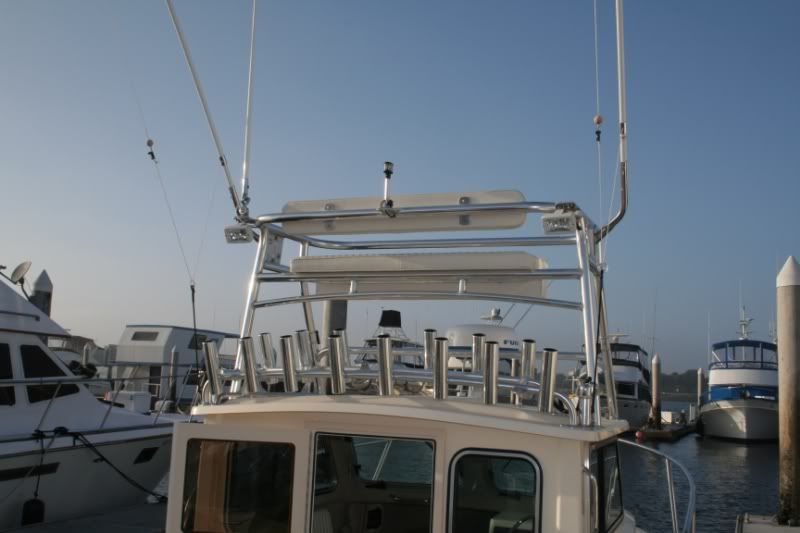
Back side of the tower showing the rod holders, antenna mount, and spreader lights.
The white running/anchor light was originally on a mast mounted on the roof. But, with the tower, bench seat, and rocket launchers filled with rods and reels -- there were just too many obstructions to be sure the light would always be in clear view. So, we moved it up on a pad on top of the tower to give it a good clear vantage point.
The spreader lights were originally mounted to tabs on the rocket launcher assembly. They too were moved up higher on the tower to give a better distribution of light.
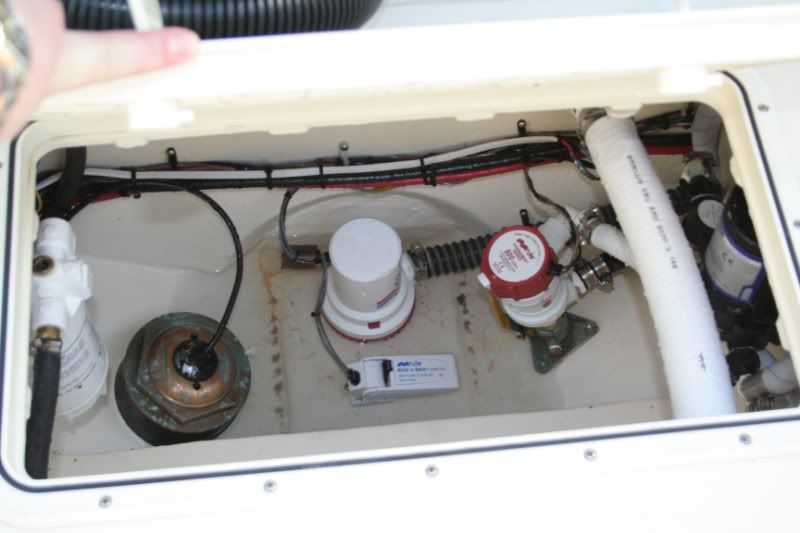
Here's inside the bilge, yeah: it's wet and dirty. That'll get addressed as soon as she's out of the slip and back on her trailer.
Left to right: The fuel water separator. I've seen some bare metal filter holder units get pretty nasty in short order. I don't have the stainless steel model, but this one has a kind of powder coating so hopefully it will hold up staying clean for a while.
Next, that rather massive transducer is the Airmar B164 1kW tilted element. She can just about meter a sanddab at the bottom of La Jolla canyon with that thing!
Next, the Rule bilge pump and float switch, the Rule 800gph bait tank pump, and finally, the Shurflo power blaster washdown pump for those times when you're knee deep in albacore blood after a triple hookup.
Another nice feature added in the recent models around 2007 or so was the removable splashwell. It's a straight panel that just latches into place when you want a splashwell, and is easily removed when you don't. The minor downside is when it's installed, it blocks access to the bilge hatch, also, you have to be careful when raising the engine not to damage the engine cowling. With it removed, you have to remember not to hurt your bare feet or trip over the metal lugs mounted in the deck. Hasn't been a problem for me, I've been running with the splashwell off and just have to remember those metal bits are there.

For the kind of gear we usually use on the west coast, those gunnel rod holders are pretty useless. A future project will be to switch those out for something I can use to stow my boathook, deck brush handle, and a couple of gaffs.
...and one more shot:

Just took delivery of our new 2008 2120 "Barely Legal" (named for my wife who is young, beautiful, and studying very hard in law school, for the size of fish and lobster I usually catch which have size restrictions, for our little 21'er who'se just big enough to go offshore for the pelagics, and for....um, nevermind.... :wink
So here's a more or less bow to stern tour:
Inside the anchor locker, the underside of the windlass installation. Anybody have any luck with using some kind of lining inside here to protect the inside hull from getting banged up by the anchor chain and to dampen the tooth jarring chain rattling when cutting through the chop?
Another shot of the anchor locker showing the hawse pipe (which is really just a hole in the bow) and the original anchor locker door with hole for the rode which is no longer needed. Should the new hole have some kind of metal hawse pipe liner or is it ok as is? I'm planning to insert something to plug the original hole in the anchor locker door that I don't need like I saw another CP user do to help keep his bilge meticulously clean and dry.
Here's underside of the dash with all the electronics installed. Extra wiring for the windlass, Furuno 1724 radar/gps/sounder combo display and the Furuno DFF1 sounder module can be seen here.
Those smudges in the top left across the curtain track is what's left of a mud dauber wasp nest that was built over last summer while the boat was sitting in the dealer's overflow lot waiting for someone to take her home. I still need to get in there with cleaner and a toothbrush to get the last bits of that out of there.
The electrical installer hooked me up with a couple of extra 12V outlets; one of them presently used to power my 12V fan AKA "the whirling blades of death".
Here's a shot of the V berth showing the port-a-potty and storage for extra life jackets and stuff.
With all the cushions in place, a veritable pasha palace.
The business side of the helm. There was a big temptation to install the Furuno display as high as possible along the top edge of the dash, the top edge even with the top edge of the Yamaha speed and tach gauges. But, I noticed some other installations that put the display close to the top edge got quite hot. I had mine installed just a little lower to give some extra airspace and it does seem to stay cooler that way.
The windlass controls are lined up with the top edge of the switch panel and the side of the Yamaha speed gauge.
To get all the electrical switches I needed to fit within the available switch panel, we doubled up the factory cockpit light switch on one side of a double throw rocker with my add-on spreader lights on the other side. The cockpit lights don't really add much with the spreader lights on, so there isn't much reason to need them on separate switches so they could both be on at the same time. This freed up a switch space so I could have a separate switch for my washdown pump and my bait tank pump.
The top right corner of the dash has a plug installed for a remote VHF mic.
The factory installed that red horn button directly under the trim tab controls. I found holding on to the bottom edge of the dash with one hand is a good way to help steady myself while running through tough chop. If that horn button were moved to the left under the racor indicator I think it would have looked better and it would leave a clear spot to hold on to the dash just below the trim tab controls so you could keep yourself steadied and operate the trim tab controls with your thumb without that horn button in the way. Oh well, I guess if these are the kinds of nit-picky details I'm left to complain about, life is good!
Here's the location of the Icom 504 VHF, the remote mic feature keeps it clean with no mic cords hanging down in the way. In my original spec to the dealer, I listed the Icom 402 VHF but the dealer gave me a free upgrade to the 504. I really appreciate the extra features of the remoted mic and the additional display features giving me a constant display of time/date and position. There's a lot of other really cool things this versatile VHF can do. If you're in the market for a new radio, you should definitely consider spending a few extra bucks for one of these.
I think around 2007 or 2008 Parker started putting in these moldings in the corner which make it really easy to run wires from the pilot house roof to the main harness and keep the installation looking very clean and sano. It also makes a great spot to mount a fire extinguisher.
Here's a shot of the cockpit showing the combination cooler/padded lounge, coaming pads and bait tank.
The Pacific Edge 48gal bait tank in all its glory
There have been many threads debating whether to go with the F150 or move up to the F200 for the 2120. In keeping with the "Barely Legal" theme and pushing everything to the limit, this one's maxed out with the Yamaha F225 4 stroke!
View of the bow with the Lewmar 700 Pro-Fish Free-Fall windlass.
Another view of the front showing the Mariner Enterprises 1/2 tower conversion, the Furuno radome on 10" seaview mast, Furnuno GPS, outriggers, and 14 rocket launcher rod holders along the back edge. The 8' Digital VHF antenna is up on a pad on the tower to give it as much height and unobstructed space as possible.
It took a few tries to get it right, but the 10" radome mast worked out perfectly to give the radome a clean shot over the tower footrest bar and rocket launchers, but stay under obstruction from the bench seat. The first go was a 5" mast which put it directly in line with the footrest bar. Some starboard was used to build up a platform to raise the mast up about 3", but that just looked nasty. Finally, switching to the 10" mast, which was originally thought to be too tall, worked out perfectly.
Back side of the tower showing the rod holders, antenna mount, and spreader lights.
The white running/anchor light was originally on a mast mounted on the roof. But, with the tower, bench seat, and rocket launchers filled with rods and reels -- there were just too many obstructions to be sure the light would always be in clear view. So, we moved it up on a pad on top of the tower to give it a good clear vantage point.
The spreader lights were originally mounted to tabs on the rocket launcher assembly. They too were moved up higher on the tower to give a better distribution of light.
Here's inside the bilge, yeah: it's wet and dirty. That'll get addressed as soon as she's out of the slip and back on her trailer.
Left to right: The fuel water separator. I've seen some bare metal filter holder units get pretty nasty in short order. I don't have the stainless steel model, but this one has a kind of powder coating so hopefully it will hold up staying clean for a while.
Next, that rather massive transducer is the Airmar B164 1kW tilted element. She can just about meter a sanddab at the bottom of La Jolla canyon with that thing!
Next, the Rule bilge pump and float switch, the Rule 800gph bait tank pump, and finally, the Shurflo power blaster washdown pump for those times when you're knee deep in albacore blood after a triple hookup.
Another nice feature added in the recent models around 2007 or so was the removable splashwell. It's a straight panel that just latches into place when you want a splashwell, and is easily removed when you don't. The minor downside is when it's installed, it blocks access to the bilge hatch, also, you have to be careful when raising the engine not to damage the engine cowling. With it removed, you have to remember not to hurt your bare feet or trip over the metal lugs mounted in the deck. Hasn't been a problem for me, I've been running with the splashwell off and just have to remember those metal bits are there.
For the kind of gear we usually use on the west coast, those gunnel rod holders are pretty useless. A future project will be to switch those out for something I can use to stow my boathook, deck brush handle, and a couple of gaffs.
...and one more shot: